UPDATED 19Jun2020 + downloadable plans below: You certainly can’t complain about the performance of modern, ready-made exterior doors. They keep out the cold and rain almost as well as the hatch on a submarine. But somehow, despite all the impressive technical stats, even the best ready-made doors still leave me wanting more. They don’t have enough soul. And when it comes to a front door, soul matters. That’s why I like to go to the trouble of making my own non-modern, non-ready-made exterior doors.
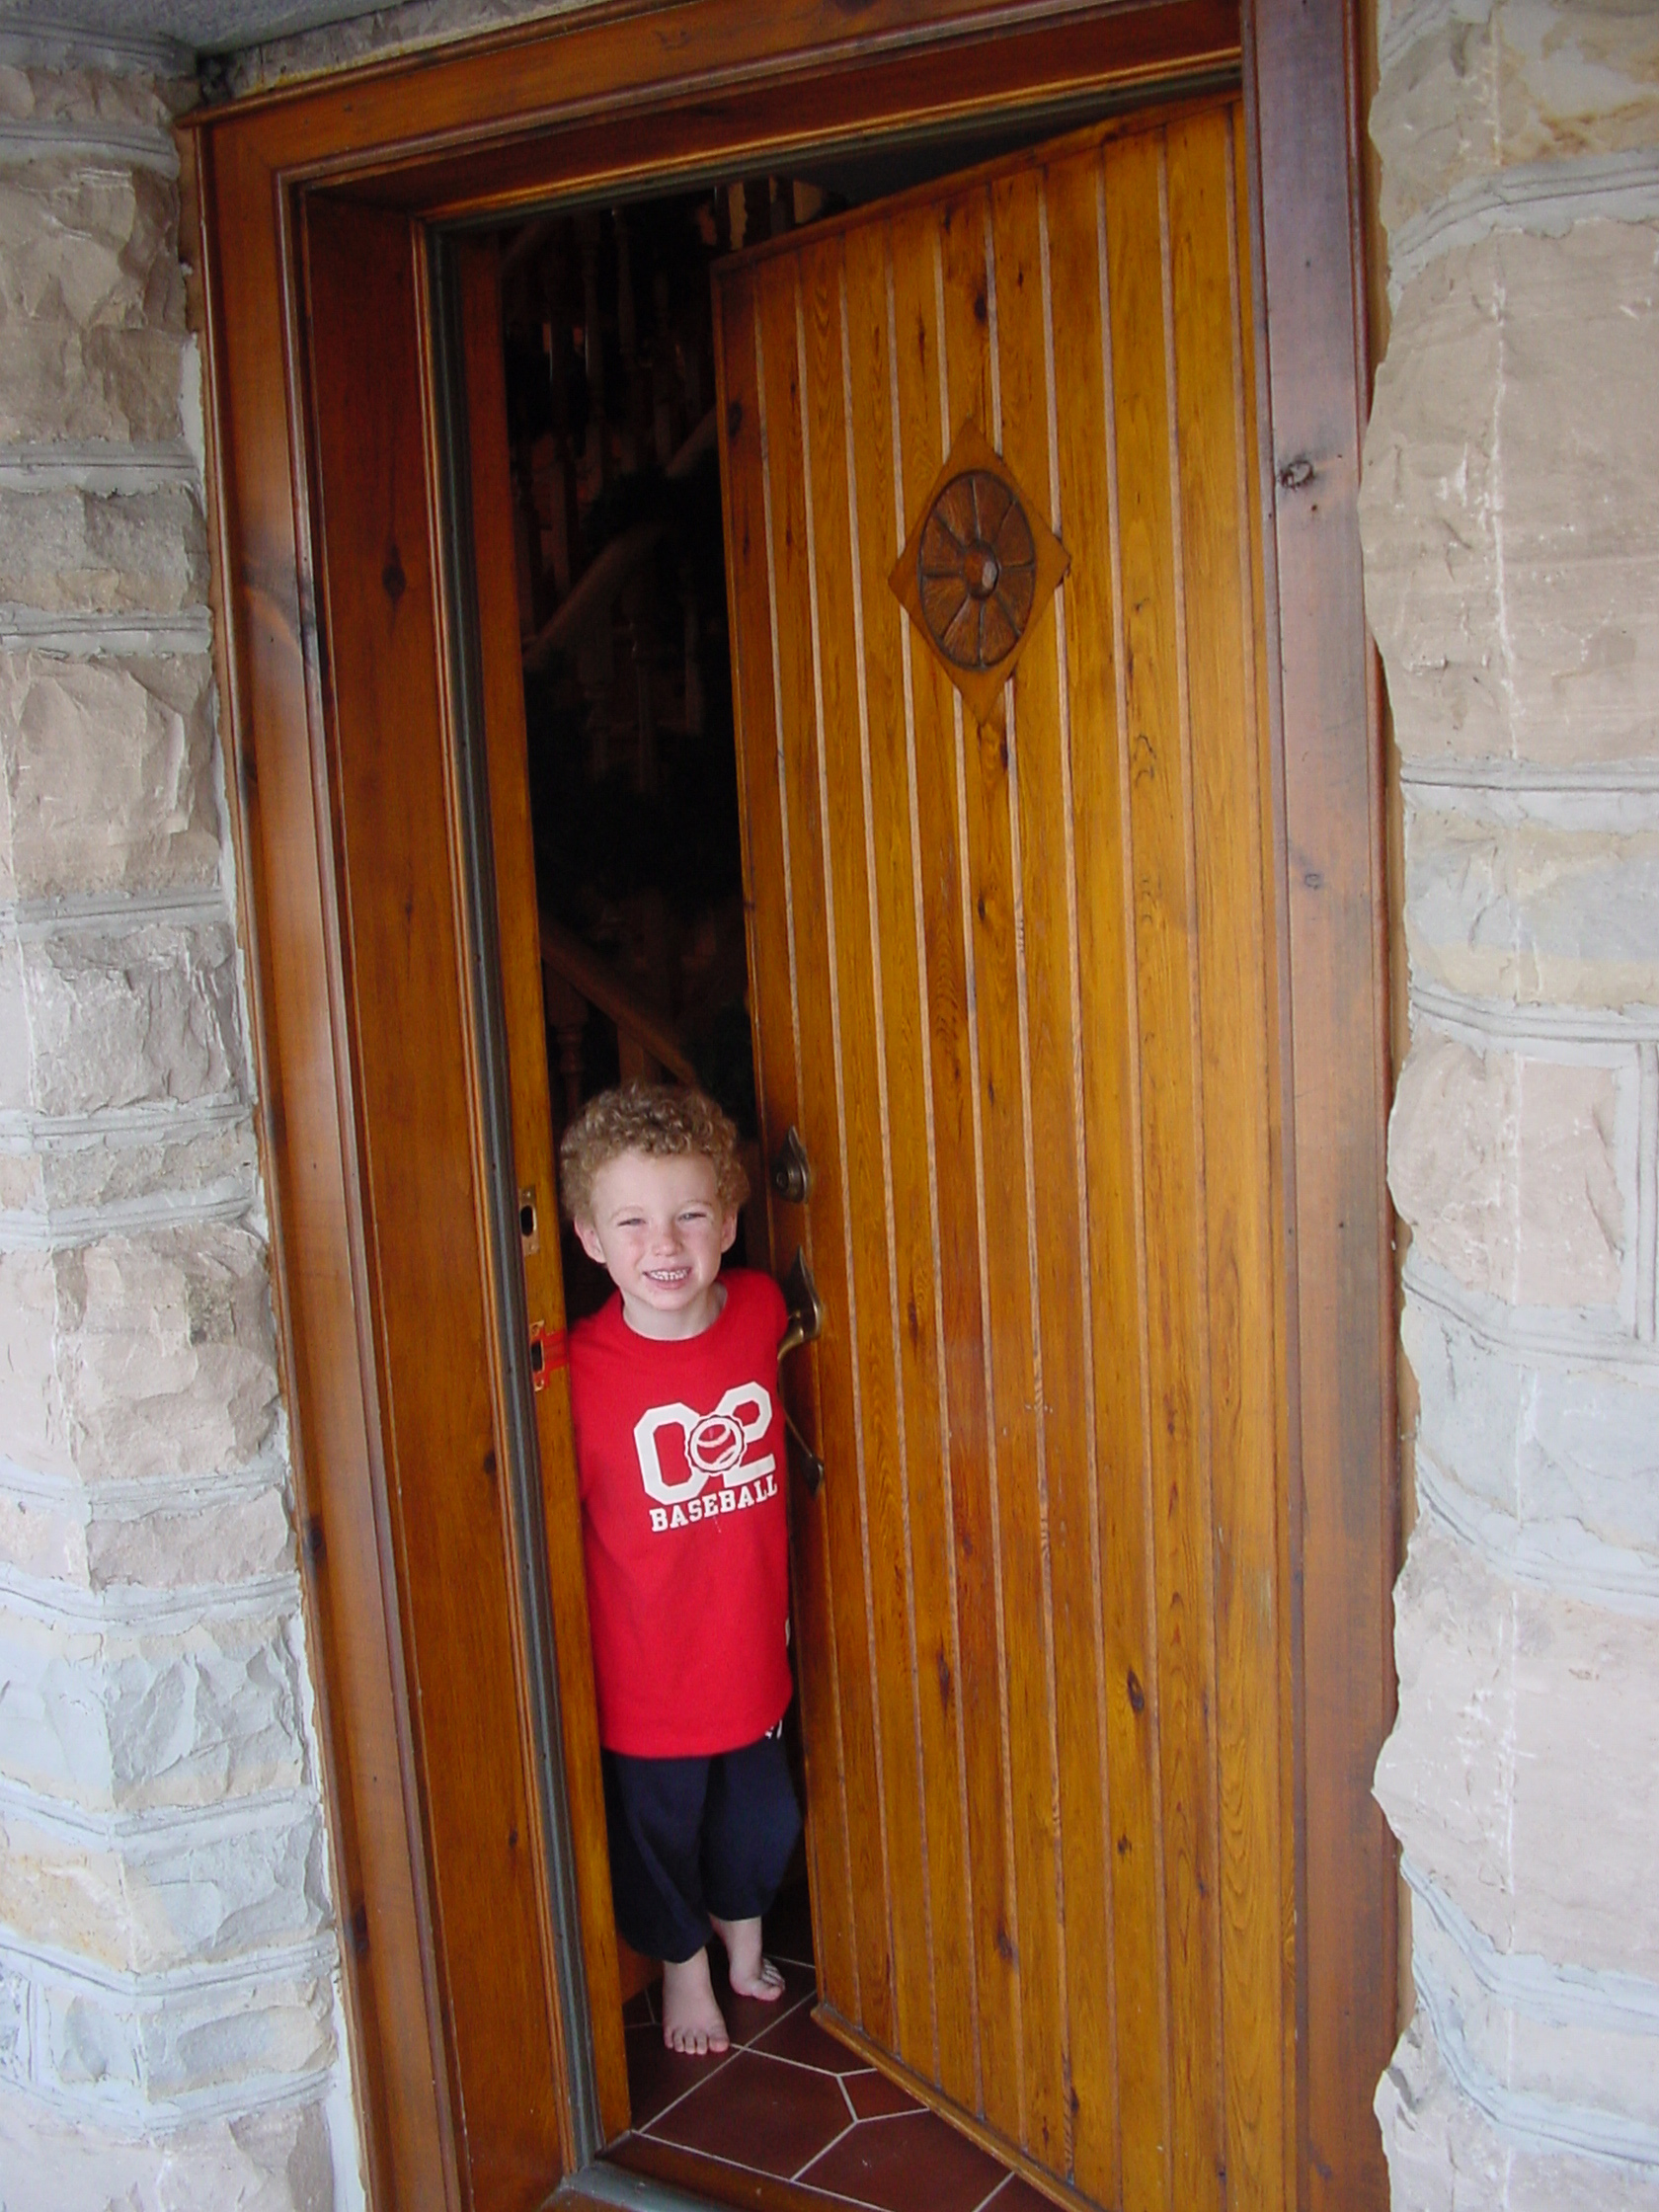
The desire for a door with soul, coupled with my frugal nature, prompted me to make my own exterior wooden doors back in 1990. We’re coming up on their 23rd winter of service and they continue to perform perfectly. If you need a new exterior door but want more than just practicality, you might consider following my example. You can build one yourself in any home workshop, or hire a woodworker to build one for you.
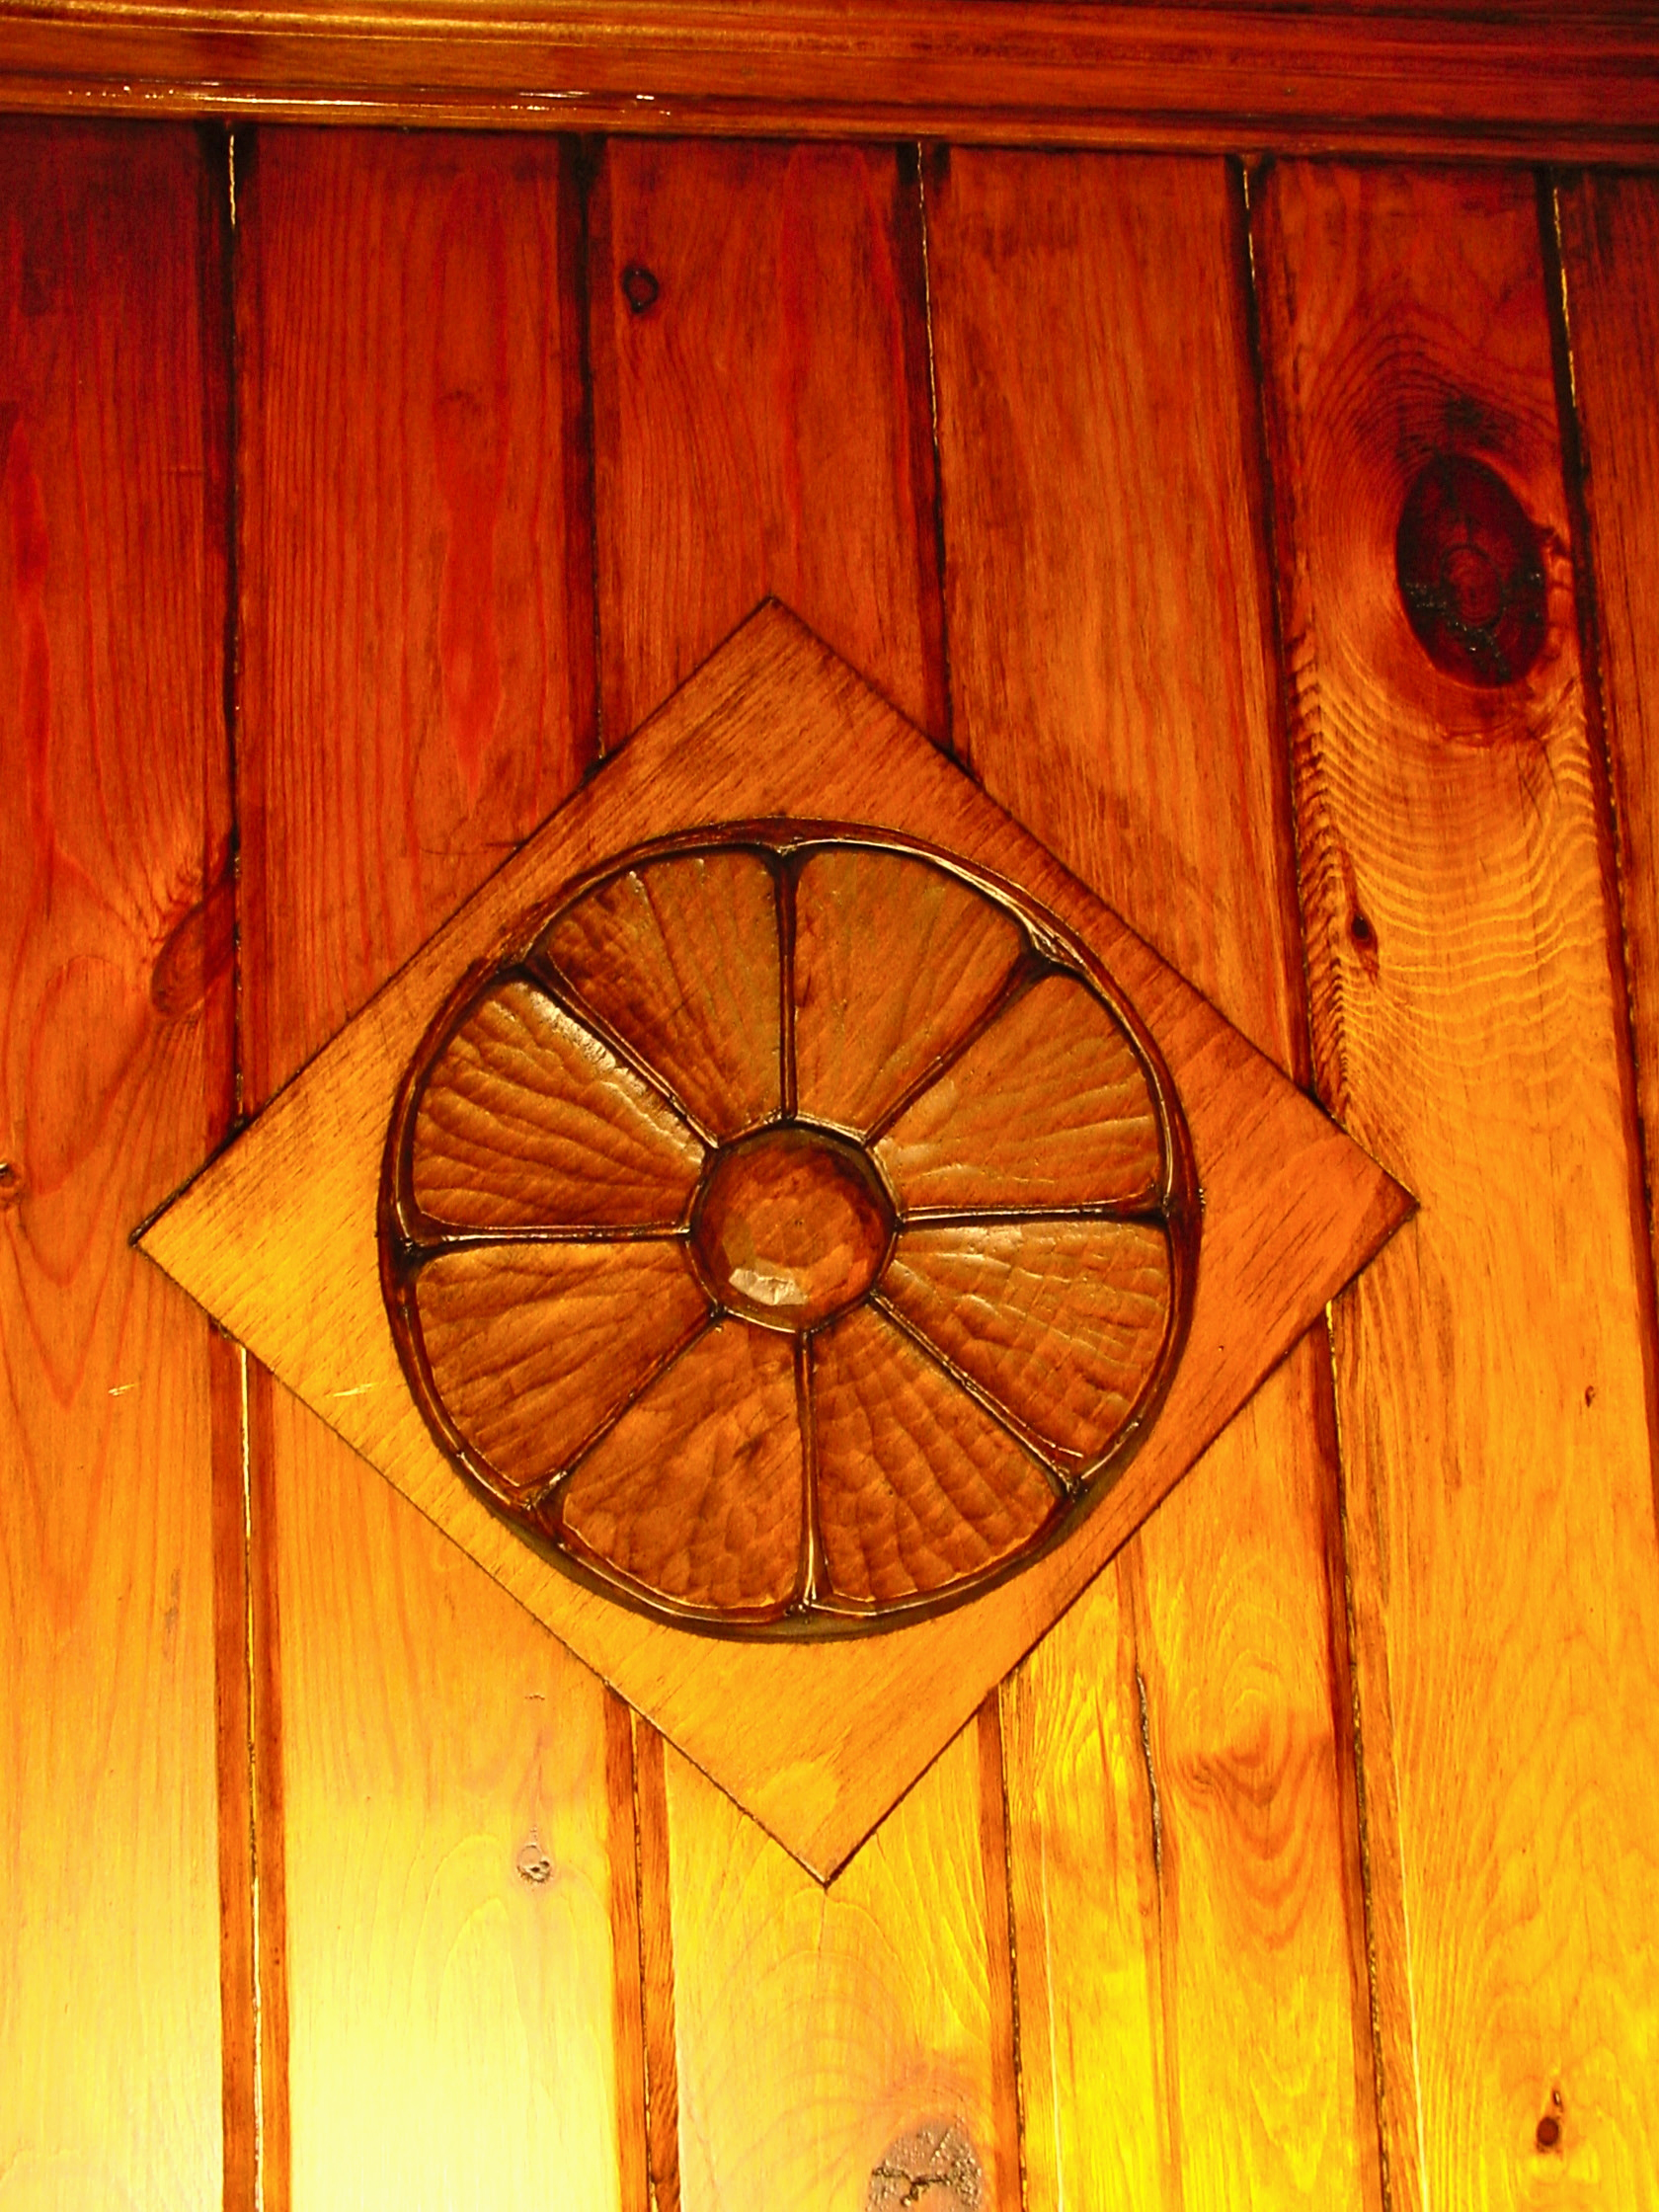
My recipe for warm, shop-built, exterior doors has three parts: a weather sealed exterior skin of vertically-laid tongue and groove lumber, an inner structural frame that surrounds an insulating foam core, and an indoor layer of tongue and groove lumber just like the one on the outside. The top, bottom and sides of the door are capped with a 1/2-inch thick border of wood that goes around the perimeter, both for good looks and to keep rainwater out of the assembly.
The extra thickness of an insulated wood door certainly looks substantial, but it also creates a challenge you need to address right up front. Before you begin work, buy the knob and latch mechanism you need for the thickness of door you’ll build. How thick is that? Although specs are open to variation, my own doors are 3” thick. With the right hardware in-hand, you can proceed with confidence.
I recommend an inner frame made of wood that measures a full 1” thick. If you don’t have equipment to dress lumber down to this non-standard size, look for something called “5/4 cedar decking lumber” at your local lumberyard. This is the only off-the-shelf lumber choices that’s 1” thick. The reason for the thick inner frame is to allow enough room for foam insulation. Anything thinner and your door won’t be as warm as it could be.
The main thing to remember about the door’s inner frame is that it has to be strong. The tongue and groove inner and outer layers won’t offer much resistance to sagging, so rigidity depends entirely on the frame. The easiest, super-strong way of connecting the top, bottom and sides of the inner frame is with lap joints, glued and screwed together. These won’t look great, but that’s okay. They’ll be covered by the indoor and outdoor skins later. The inner frame members should be about 5” wide, so there’s lots of wood around places where the door knob and hinges will be installed. Use a weatherproof glue for all joints. Brands like Titebond, Weathertite or any brand of polyurethane glue. Ordinary carpenters glue turns to mush in wet weather.
The outdoor skin keeps driving rains out of the inner core, yet it must also be free to expand and contract seasonally. The 3/4”-thick x 3”-wide tongue and groove boards I recommend for the outdoor skin serve this purpose, but only if the joints between each piece are sealed with caulking during assembly. The best product for this job – polyurethane caulking – wasn’t available when I made my doors, but you should use it now. Polyurethane is strong, it sticks like crazy, remains flexible and takes paint. No other caulking can meet all these challenges as well.
With the outer skin complete, cut pieces of 1-inch thick rigid foam board to fit loosely within the spaces of the inner frame. Fill all perimeter gaps with spray foam, let it it harden, then trim off the ooze out. The indoor skin goes on next, just like the outer one, except you can omit the caulking. Use just glue and finishing nails.
The weight and solidity of shop-built doors is one of their advantages, but you have to make allowances for this during installation. Be sure to use three heavy-duty hinges to hang your door, not the usual two. The best hinges include ball bearings instead of a plain, centre-pin. High quality hinges assure that the pleasing thunk of the closing of your shop-built door is something you can count on for years.
Click below to download high-resolution printable plans for building your own warm, insulated exterior door.