Featured Video
In a world where power tools rule, hand planes still offer the chance to boost the quality of woodworking in ways you might not realize. No matter how good power tools get, there will always be jobs where a well-tuned hand plane is the best option. Drum-tight joints in stain-grade trim, hand-beveled raised panel doors, or hand-planed solid wood cabinet parts and fireplace mantles – in cases like these you can’t do better than a razor-sharp hand plane.
Before I tell you all about this, watch the video below. It shows how I use a hand plane to smoothen rough-cut lumber with no loud noise or airborne dust. You probably haven’t seen anything like this before. I don’t always smoothen wood this way any more, but I did this for years making custom furniture for clients. I don’t know anyone else who planes lumber by hand like this old fashioned way.
How to Choose a Hand Plane
Build a collection of a few good planes, learn to keep them sharp and they’ll improve your woodworking results forever. As long as the world still has electrical outlets that work, hand planes will never replace power tools. That’s fine. But a good hand plane can still supplement electric tools in ways that makes your work stand out. The thing is, it’s easy to waste your time with a bad hand plane, too. Most modern ones are junk.

If you’re new to planes, consider starting with a block plane. That’s what you see above. Plan to spend at least $75 to $100 on a good one because anything cheaper will probably cause you frustration. I rarely see a decent hand plane for sale in hardware stores any more (they’re made too cheaply), so I wouldn’t hold out much hope there. Planes built before WWII are almost universally good, but it’s not always easy to tell how old a plane is at a garage sale or second-hand store. Some of the best new hand planes in the world are made in Canada by Veritas Tools. I own several of their planes and they’re great. My favourite block plane has a low-angle design with the blade set about 12º from horizontal. This creates a very shallow slicing action that’s ideal for trimming the kind of end grain surfaces you’ll be dealing with as you bring trim joints together.
As wide, stain-grade trim becomes more and more popular in homes, the usefulness of a low-angle block plane increases. It’s the tool of choice for finessing trim and molding joints together when latex caulking isn’t an option to fill joint gaps because paint can’t be used to hide the mess. When it comes to stained trim, you either get the joint right or wrong. There is no forgiveness.
Before you write all this hand plane stuff off as the wishful thinking of a guy trapped in a time warp, think again. More than once a few swipes with a hand plan have made all the difference, even on the modern, fast-paced jobsites I’ve worked on. And it’s not just about installing better trim, either.
Hand Planed Raised Panels
In a world where so many factory-made frame and panel cabinet and vanity doors all look like they came rolling off the same conveyor belt, a hand plane offers a quiet and simple alternative. And it all comes down to beveling the edges of raised panels by hand, instead of the usual router table or shaper-cut profiles. Sounds slow and labour-intensive, I know, but it isn’t really. It’s actually fun. You can see the process unfold on video below.
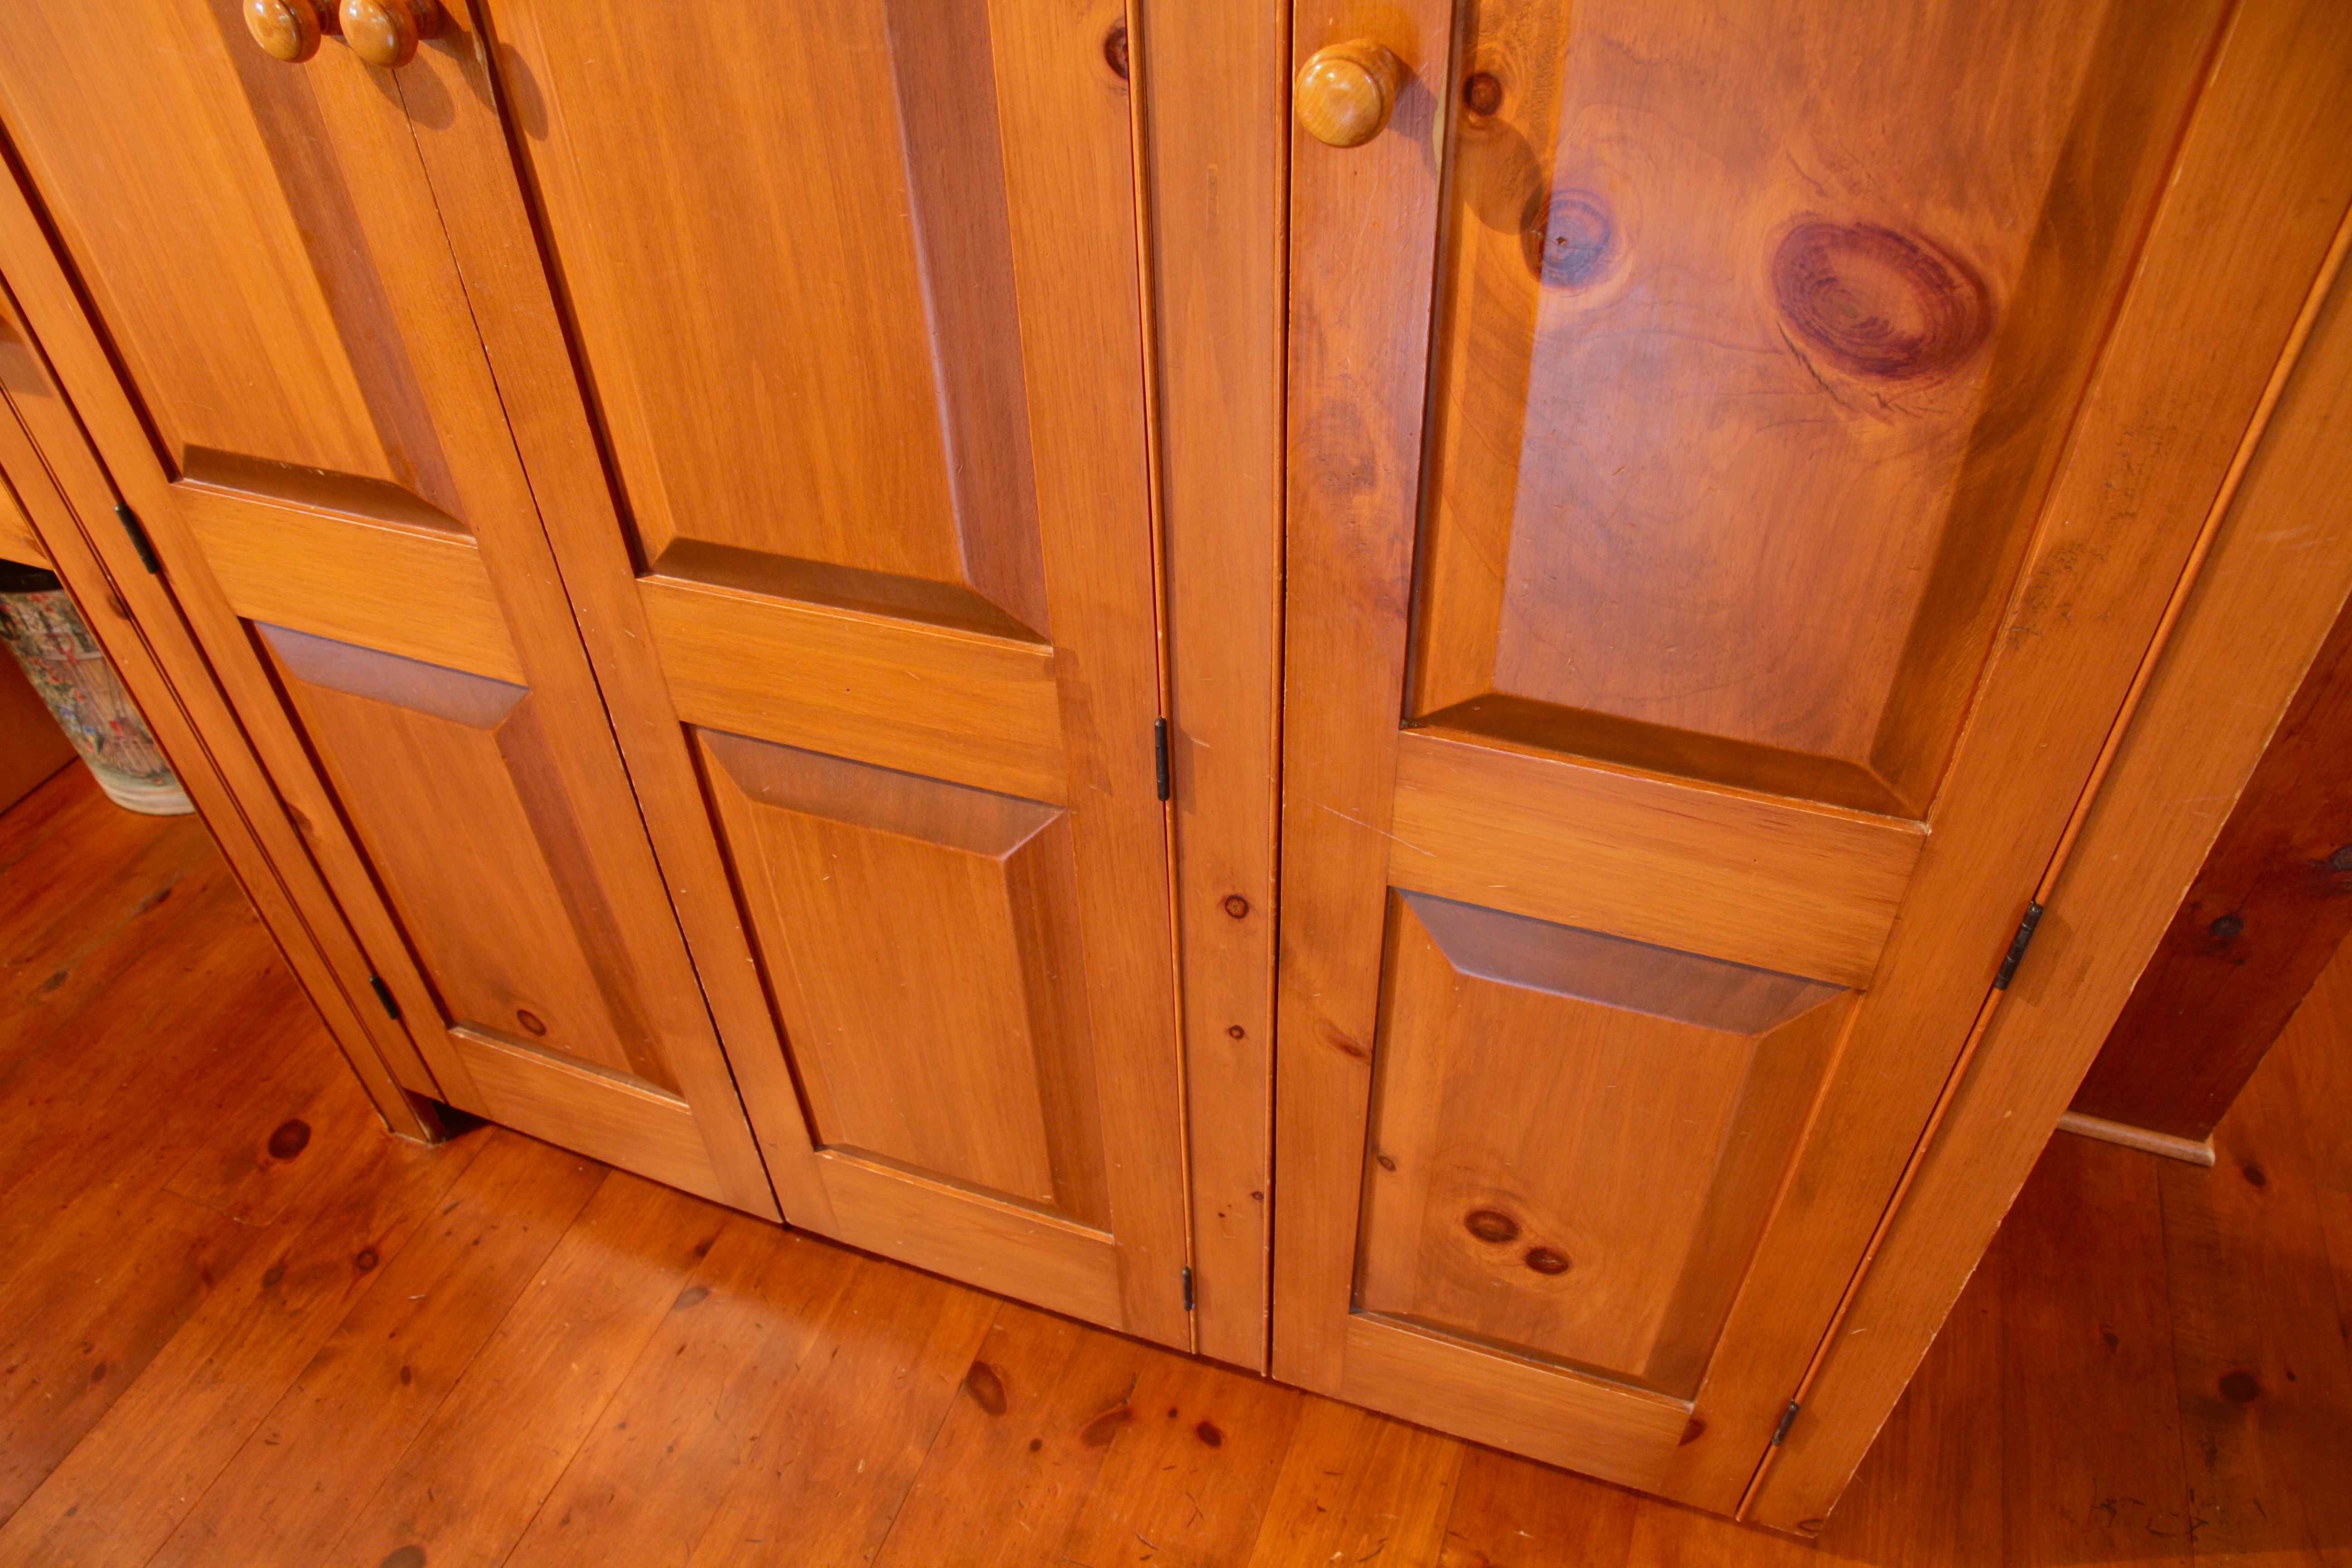
All frame and panel designs offer two things. First, they look terrific because of the texture and visual variety they present. That’s what you can see in the photo below. But frame and panel designs also limit the troublesome seasonal movement that’s the hallmark of all wide expanses of solid wood. The inner panel gets larger and smaller with changes in humidity, while the outer frame remains more or less the same size. Building your own hand-beveled frame and panel doors does all this in a format that looks way more classic than anything available off the shelf.
Frame and panel work always begins with the horizontal and vertical members of the door frame. These are called stiles and rails. You can use biscuits or dowels to connect these parts. Even pocket screws do just fine if you’re making raised panel wainscoting that’s destined to be installed permanently against a wall.
When it comes time to making your raised panels, there’s a timesaving trick. Your plane doesn’t actually cut most of the bevel. Instead, use a tablesaw to hog off most of the waste with the blade tilted 15º to 20º from plumb. The plane comes into use afterwards for removing the saw marks while making the bevels all a consistent width and thickness. Keep trying one of your grooved frame members periodically on the edges of the panel as you plane. The idea is to adjust the thickness of the bevel’s edge so it plugs nicely into the stile and rail grooves you prepared earlier. To help you get bevel width perfectly consistent, use a combination square and pencil to mark a line some consistent distance in around the perimeter of the panel. A 2-inch wide bevel is ideal for most cabinet doors. Expect to pay about $200 for the kind of smoothing plane that’s ideal for raised panel work. If you didn’t watch the video showing all this farther up on the page, scroll back and watch how it all works.
Hand-Planed Surfaces
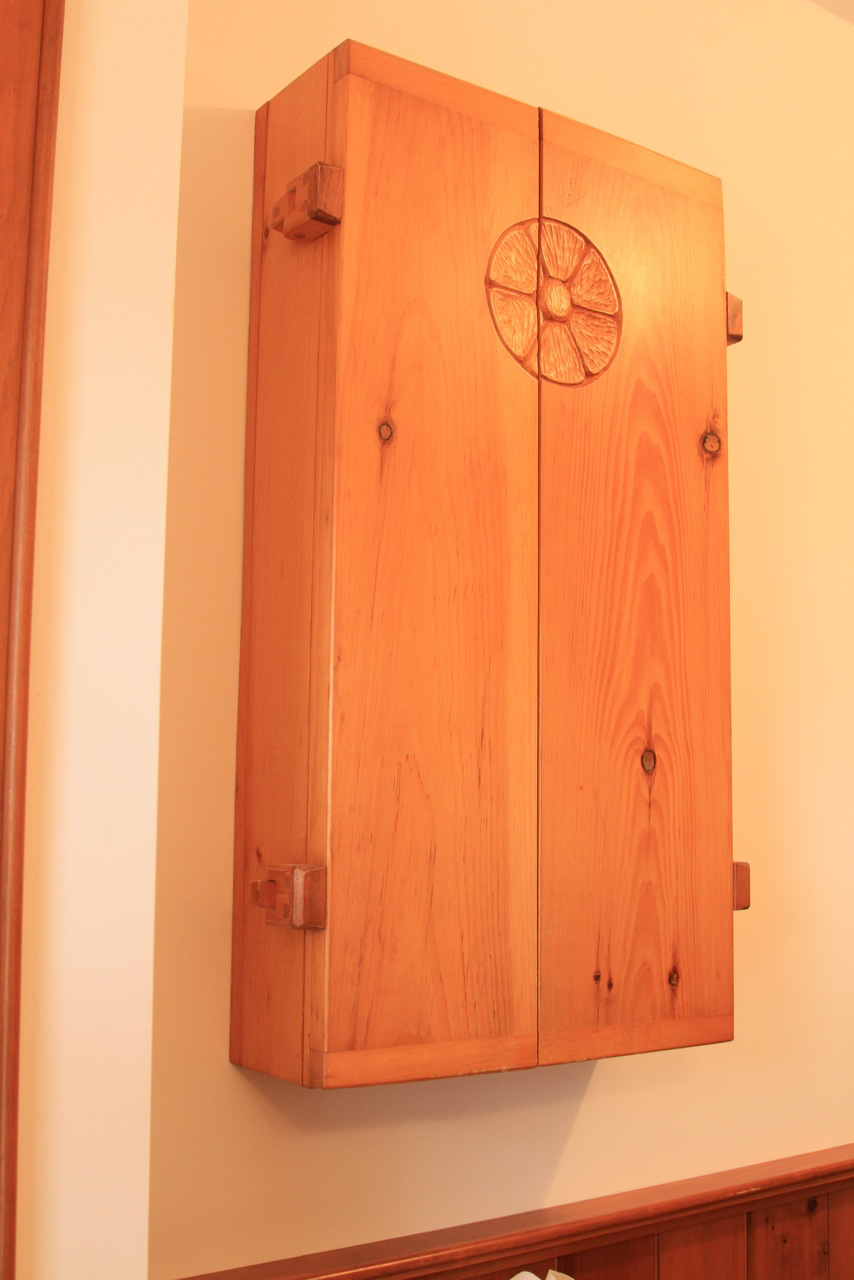
If you really want to look like an old-world master, consider using a hand plane for smoothing solid wood cabinet sides or fireplace mantles. That’s right, no sanding just a hand planed surface as a final step. I built the cabinet you see below back in the mid-1980s with hand tools only, including the use of a plane for final smoothing of the rough white pine lumber I was using. The subtle undulations left behind by a slightly curved blade of the plane is a hallmark of traditional woodwork and much appreciated in a world where too much is accomplished by machine.
Hand planing like this goes surprisingly quickly, too. It takes less than half an hour to hand plane a rough-cut 4×10 pine mantle that’s eight-feet long. That’s twenty bucks of labour time to create a one-of-a-kind home feature that can easily be sold for several hundred dollars if you wanted to start a little sideline business.
Although you can use a smoothing plane for this kind of surface work, a scrub plane is better. It has a slightly curved blade that creates subtle and unmistakable undulations in the wood surface. You can get a good scrub plane for about $150.
How to Sharpen a HandPlane

By now I hope you’re eager to give this hand-plane thing a good try because it really is worthwhile. But there’s one more thing you need to know first. A razor-sharp blade is absolutely essential. And I mean razor-sharp, as in sharp enough to shave hair cleanly. That’s how you get paper-thin shavings like the one you see below. Without an ultra-sharp blade nothing happens. The good news is that sharpening needn’t be the pain you probably have experienced it to be. Not if you have the right sharpening equipment, that is.
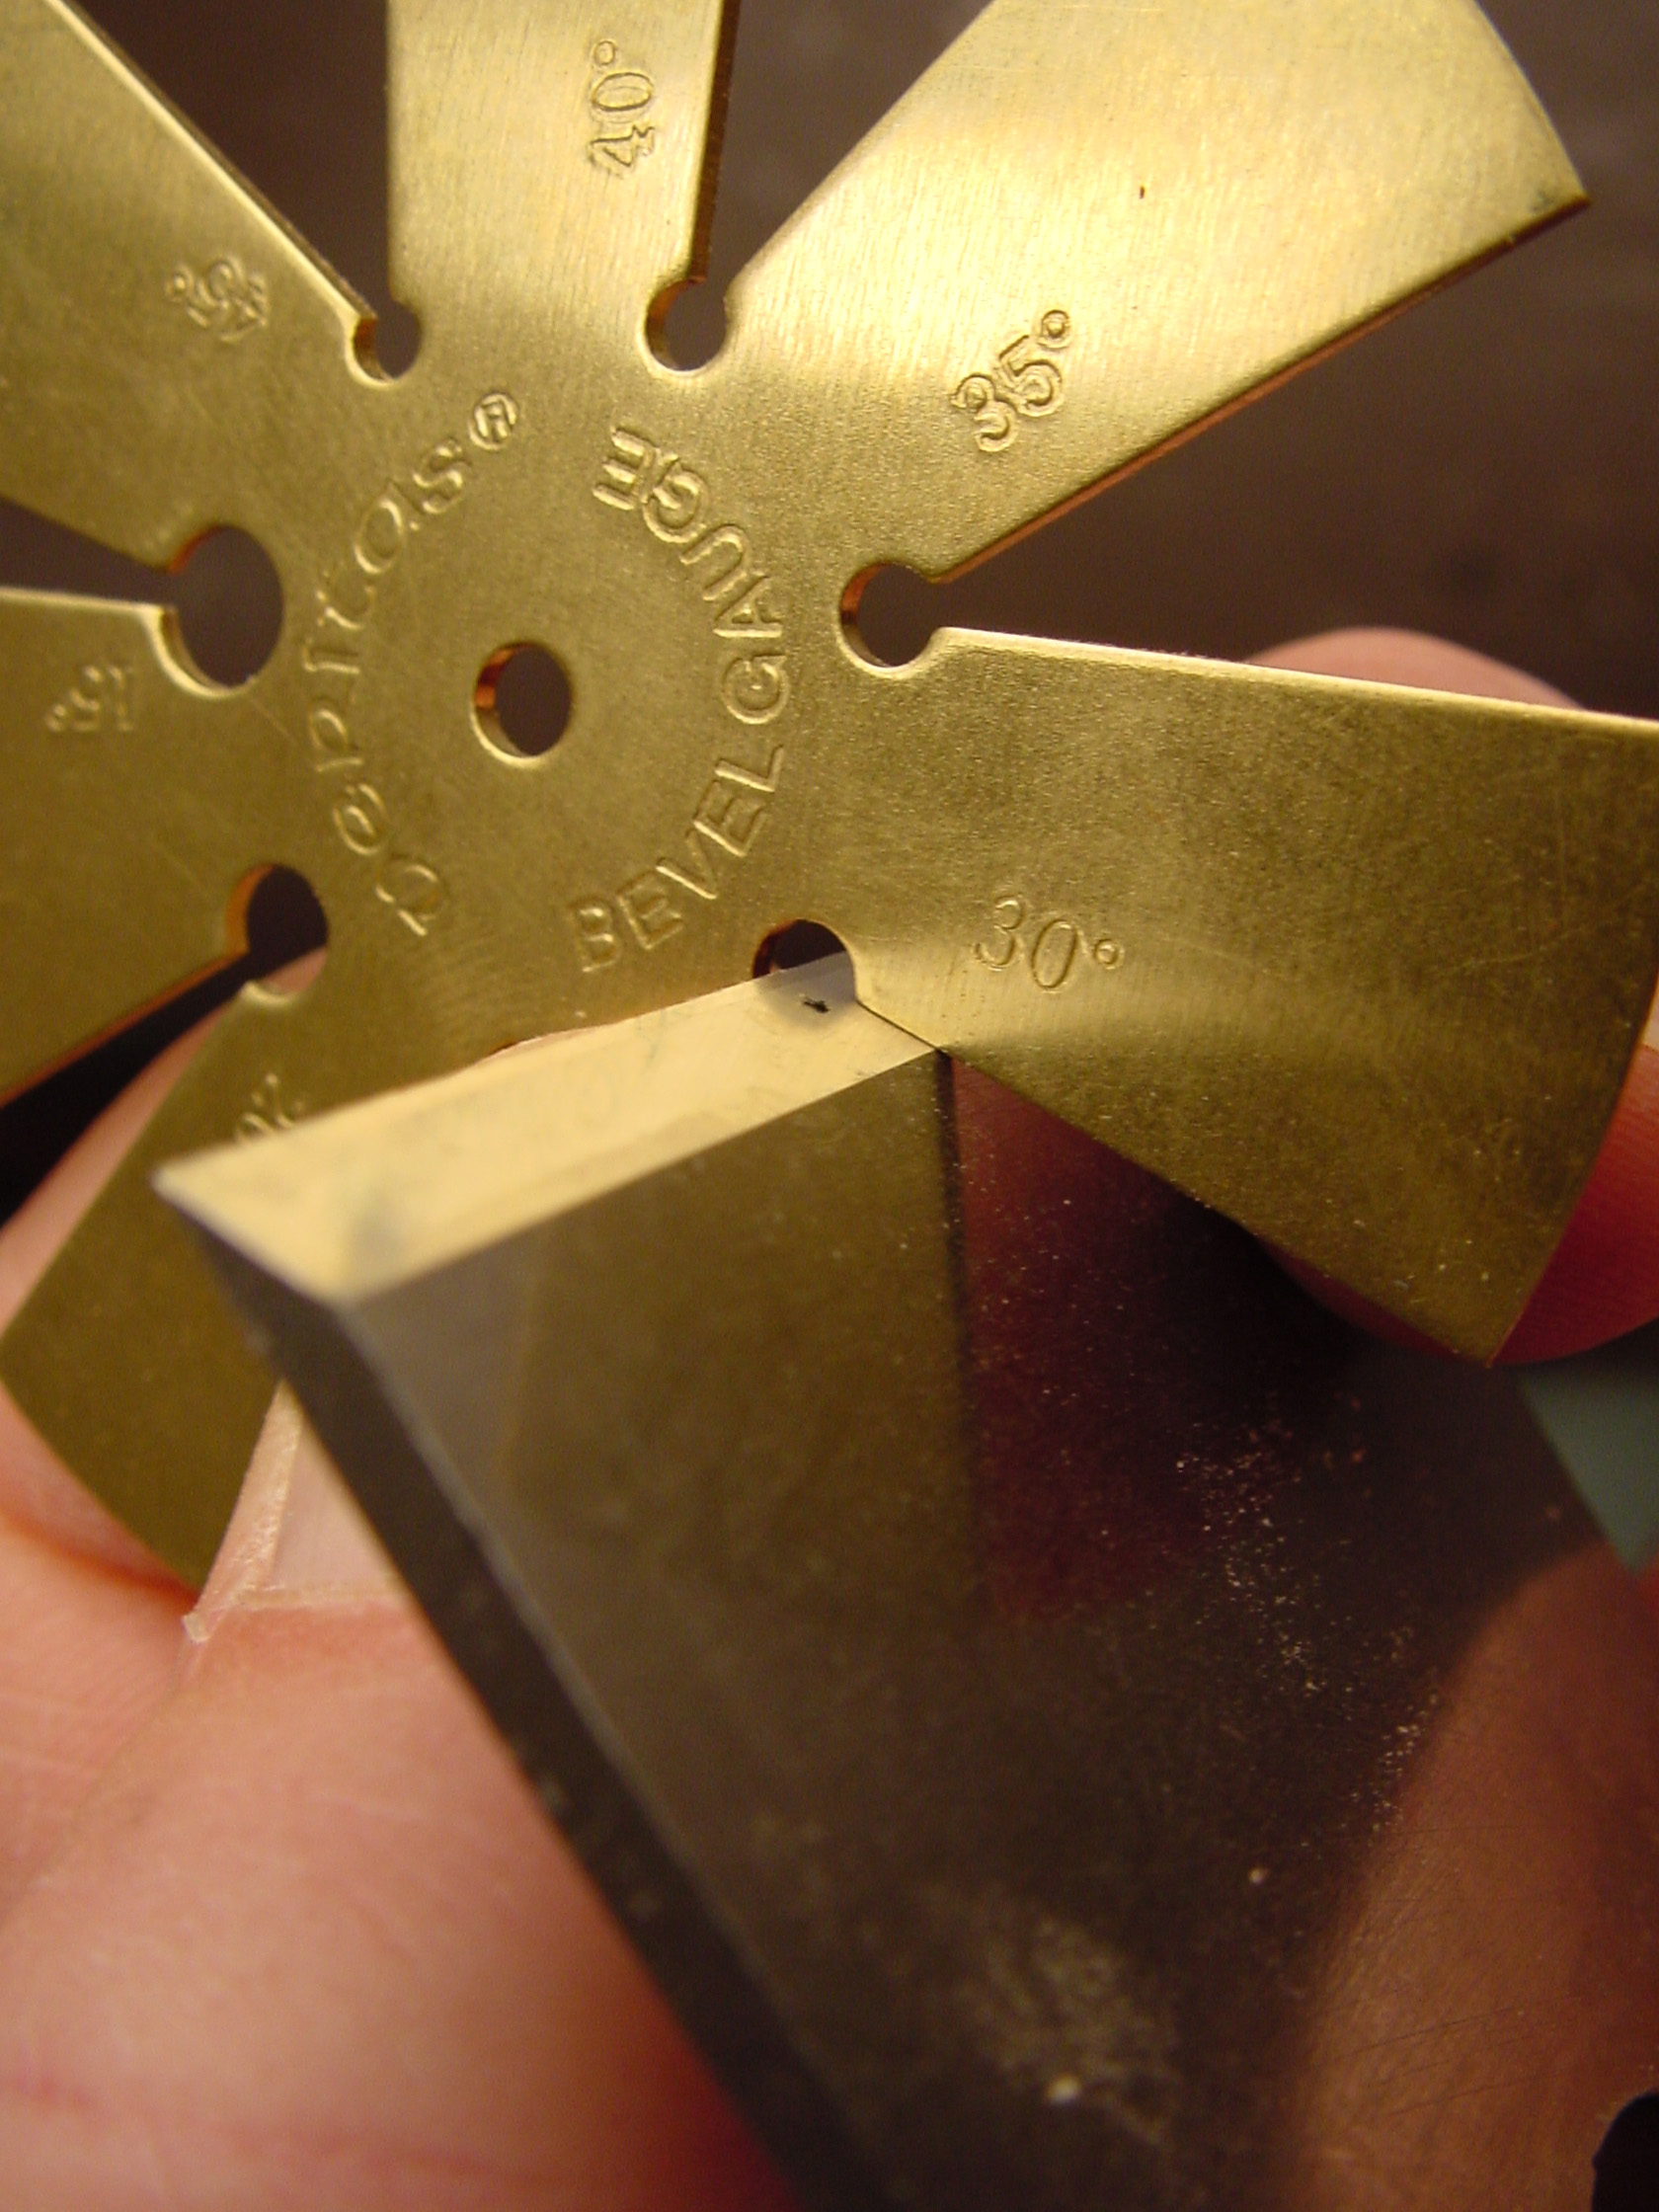
There are two requirements behind every sharp edge: a correct bevel angle of 25 to 30 degrees at the tip of the plane blade, and a finely honed edge that’s capable of cleanly shaving arm hair or slicing curls of end-grain from softwood test blocks. Sharpening a plane iron (or any edge tool) is a product of these two steps: grinding (doesn’t need to happen often) and honing (needs to happen often).
If your plane is brand-new, you can probably skip the first sharpening step altogether – the grinding. Top-quality, factory-fresh planes are always ground correctly. But let’s say you’re dealing with an old plane iron that’s seen lots of brutal action, perhaps even opening paint cans or stripping furniture.
Successfully grinding a plane iron like this demands the same things needed for reworking the business-end of any edge tool. You’ll need a stationary grinder with a tool rest capable of supporting the plane iron securely while reshaping its surface with minimal heat built up. That’s my setup in the photo below. Understand right now that heat is the enemy of every edge tool. If your plane iron becomes yellow or blue at the tip because of grinding heat, it will never hold an edge properly again. At least not until it gets re-tempered by someone expert at working high-carbon steel.
Here’s another thing . . . When it comes to tool grinding machinery, you’ll find more than a few wet grinders that can do a great job for you. Trouble is, they’re usually way more money than what you can justify for occasional tool grinding. And make no mistake, grinding doesn’t have to happen all that often. The good news is that an ordinary, inexpensive bench grinder can do a great job preparing plane irons, as long as you upgrade the tool rest and the grinding wheel. A generous size, easy bevel angle control, and a sliding tool holder are all features you’ll find on good tool rests.
While you’re thinking about your grinder, you should consider is a cool-running, soft-bond wheel. Except for their white color, these look the same as regular grinding wheels. But the softer consistency means that fresh, sharp abrasive particles are continually being exposed while grinding. These remove tool steel with less friction than the old, rounded particles that develop on traditional wheels. The result is a cooler grind, though the cool wheels do have a somewhat shorter working life.
But even with a cool-grind wheel on your side, you still need to be careful. Don’t make sparks for more than two or three seconds before dipping the tip of the iron in cold water for five seconds. Keep the grinding and cooling process going until the entire bevel shows an even, fresh surface, with a small burr of rough metal formed at the tip.
Honing comes next, but don’t worry. This is the fun part. Although I have an entire collection of Japanese water stones in my shop, I almost never use them because I’ve discovered something much, much faster. Instead of stones, I go directly from the grinder to a hard felt buffing wheel charged with a chromium oxide abrasive compound. All it takes is two minutes to impart a scary-sharp edge on any freshly ground plane iron. And buffing a slightly dull edge back to exquisite sharpness takes even less time. Just hold the edge of the plane iron tangent to the wheel as it spins, with the tip pointing in the same direction as wheel rotation. Buff the back surface first, then the bevel. When the surface shines like a mirror, you’re done.
Razor Sharp Tools in Minutes – Really!
As I mentioned before, buffing is the only way I hone my tools and it’s been like this for many years. Buffing is much faster than sharpening stones and the results are better, too. Click here to learn more about the buffing system I use. This is the same system I’ve been teaching in classroom workshops at wood shows.