 UPDATED 19Jul2019: Building a table is one of the most deceptively simple woodworking projects going. What could be easier than gluing up a few boards and applying a finish, right? But reality is often surprising, because building a table – and especially the table top – can go wrong in ways you might not realize until it’s too late. Here are my favourite table construction tips, plus advice on how to avoid trouble.
The first serious woodworking project I tackled back in the early 1980s was a table. It didn’t turn out as nice as I’d hoped, but I’ve learned a thing or two since then. If you’ve got questions after reading this article, send me an email at [email protected]. We’ll figure things out together.
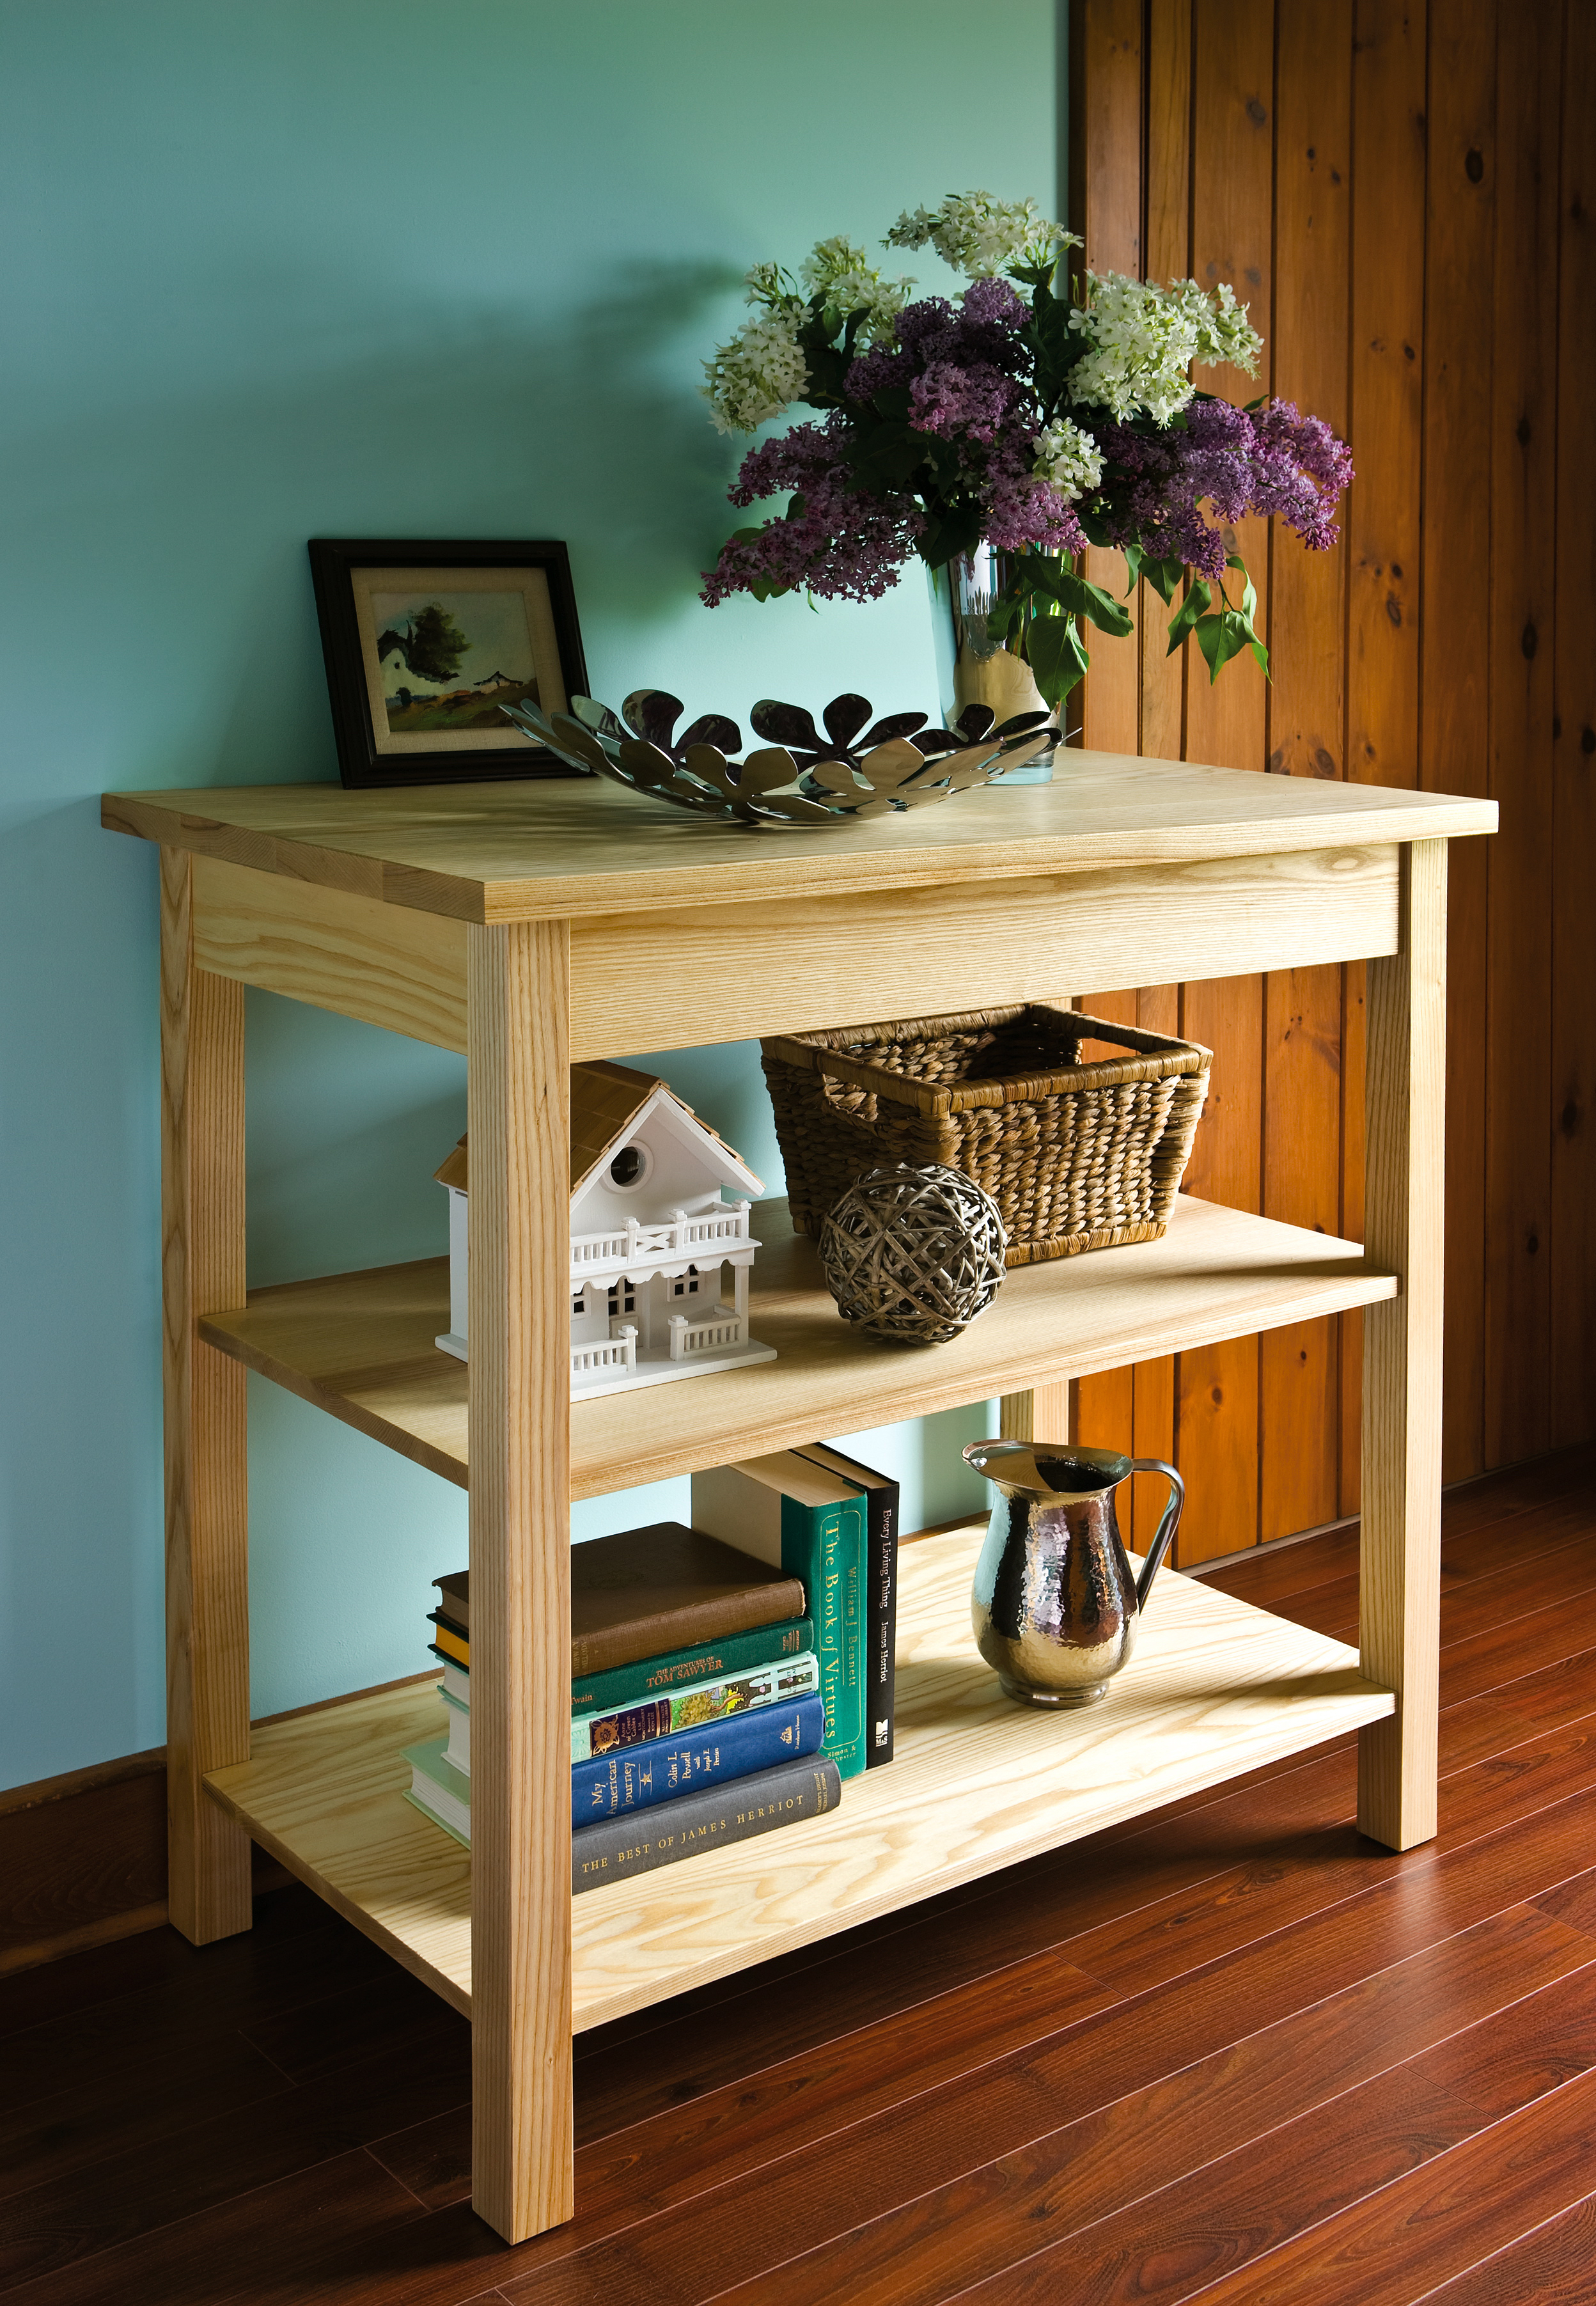
How to Build a Table Step#1: Settling on Size and Shape
A piece of 1/2” plywood offers the best approach for determining the optimal size and shape of your tabletop because it lets you test and tweak various options in 3D. Cut the plywood to the maximum size you might want, set it up on something in the place where the finished table will go, then live with it for a while. Should the top be narrower? Shorter? Now’s the time to find out. Saw some off your plywood mock-up if need be, then live with the new size until you’ve found the sweet spot.
How to Build a Table Step#2: Jointing Boards and Glue-Ups
 Crisp, tight joints are key to any great tabletop, and this is where the jointer comes in. Get help supporting boards longer than about five feet as you work. Also, if some joints don’t come together tightly, despite your best jointing efforts, try moving the boards to new locations if grain patterns permit. Some edges just naturally fit together more tightly than others. Don’t own a jointer? Pieces of planed lumber sometimes fit together just fine without jointing. Try different boards as neighbours to see which ones get along the best.
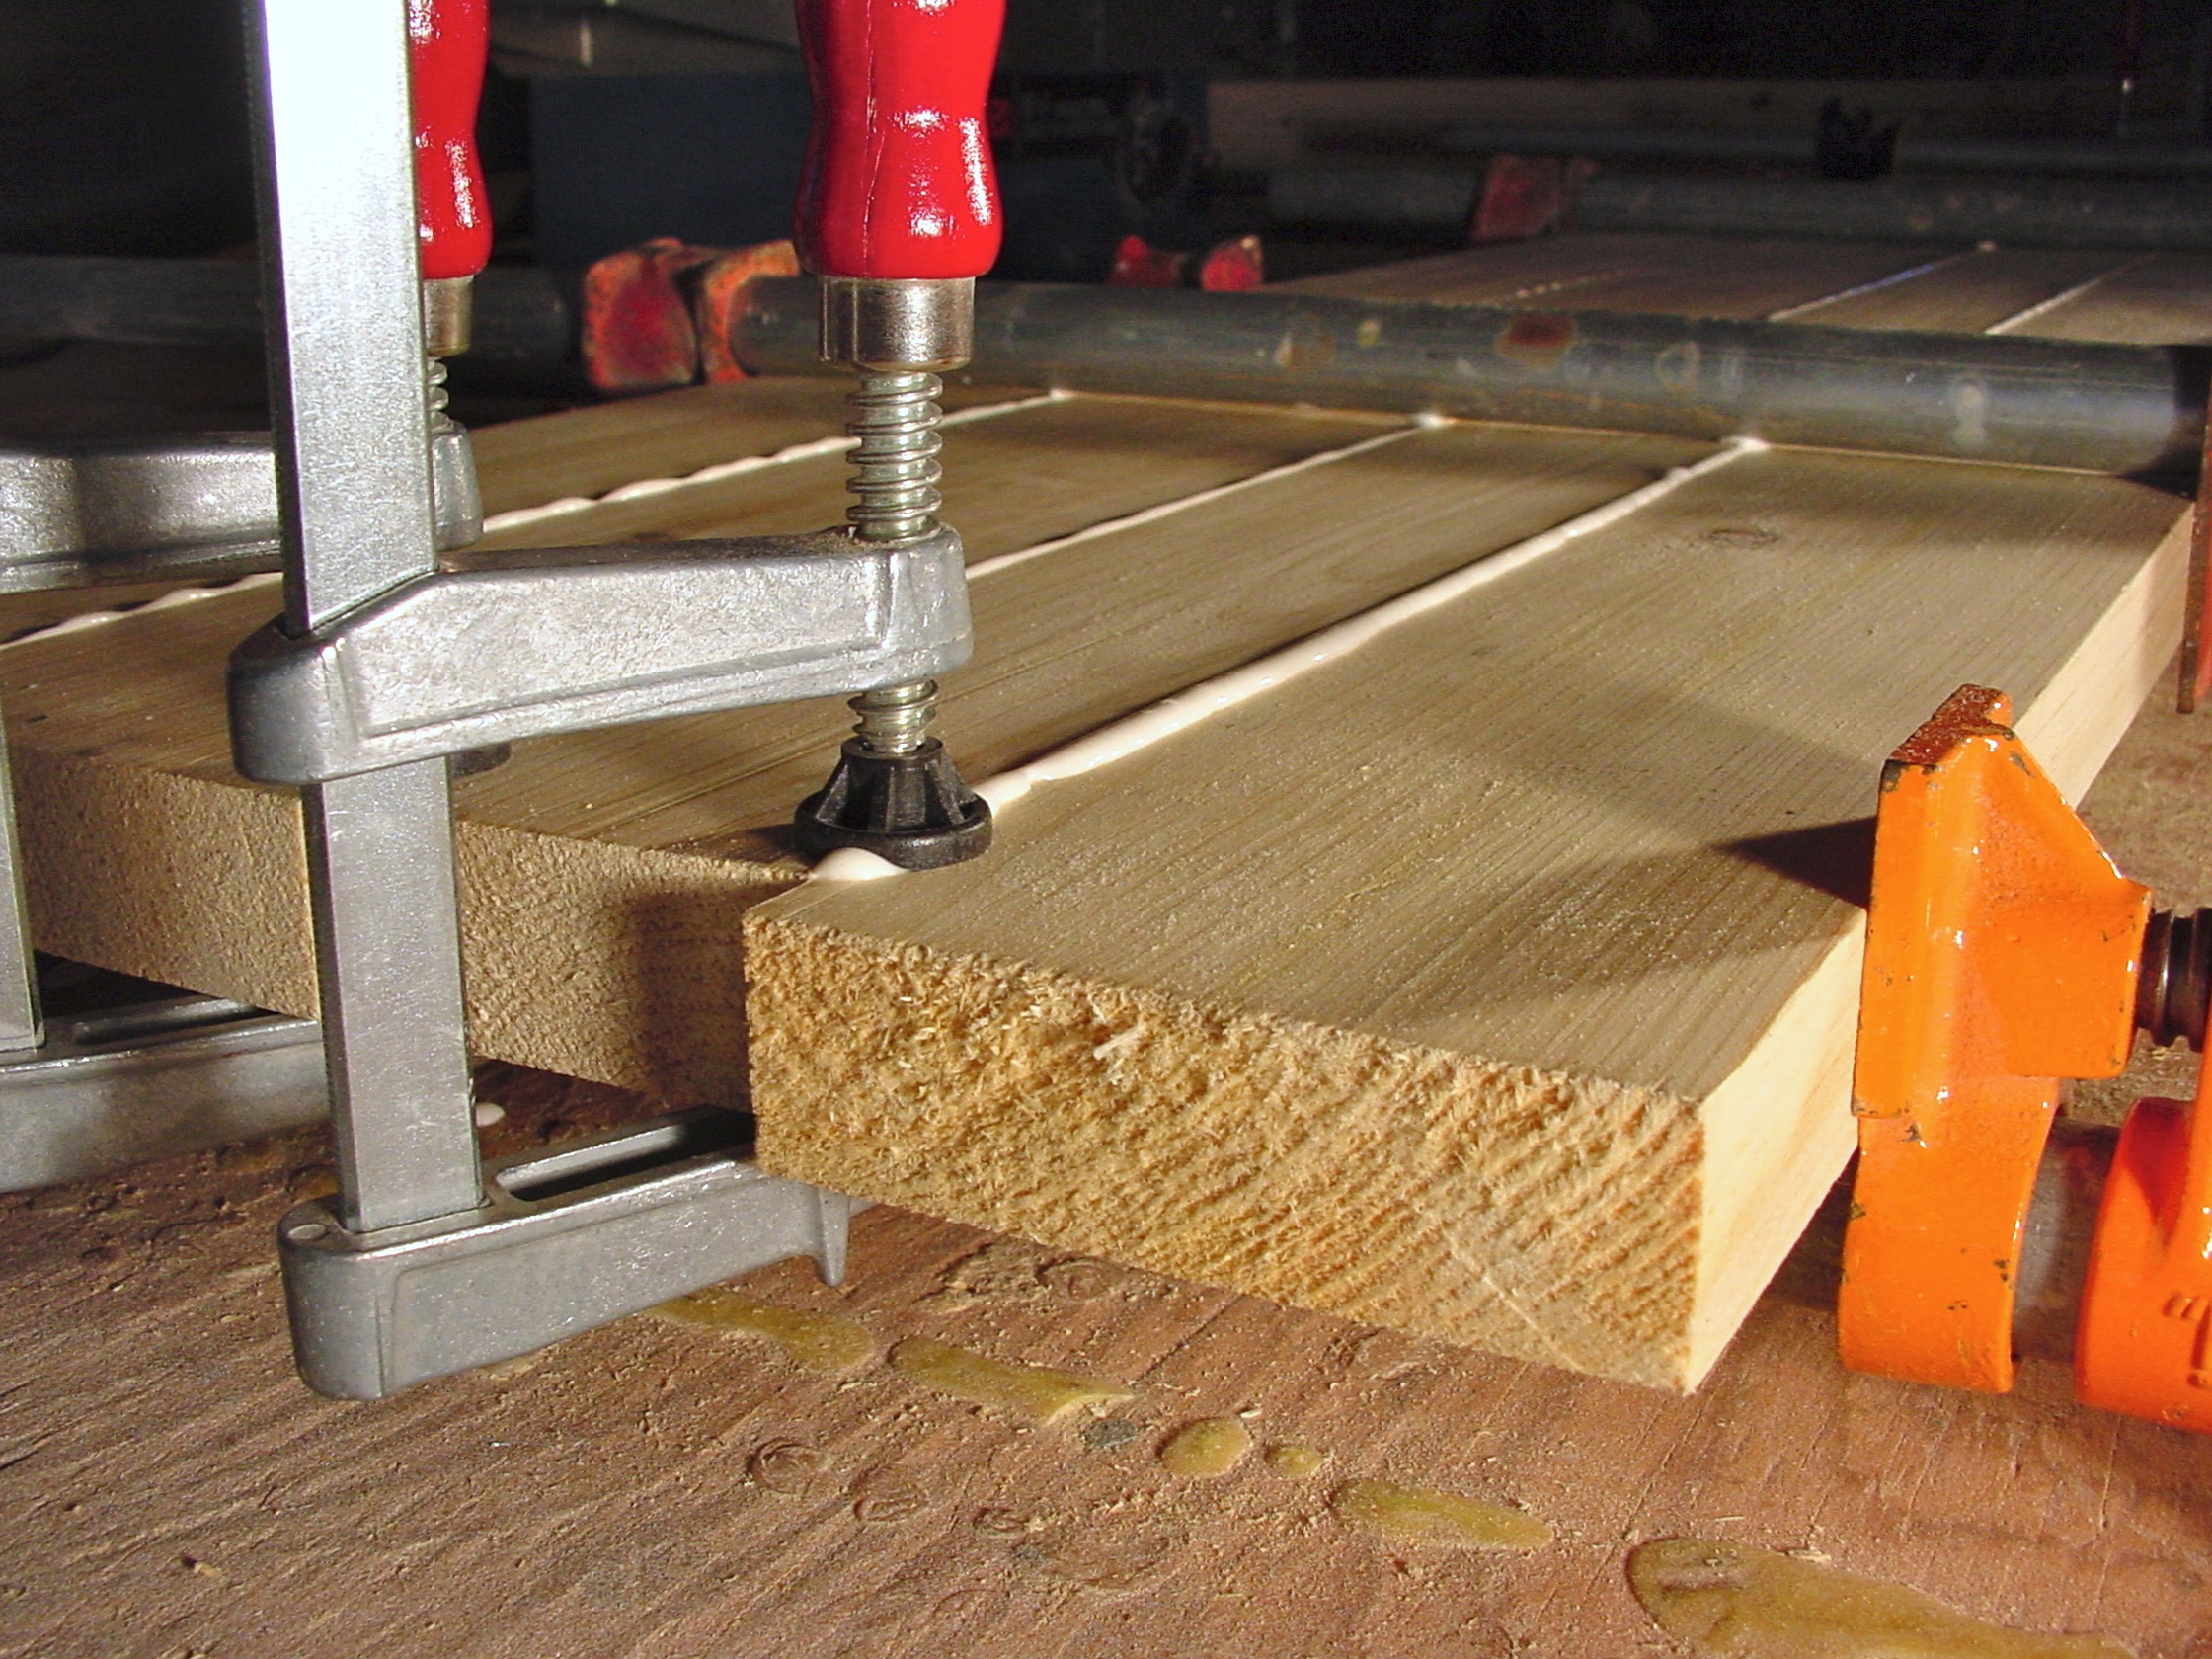
Even a small tabletop presents a challenge if the boards you glued together have stepped-shaped misalignments where they meet because of warping. Yes, you can sand these off, but the more topographical sanding you need to do, the less flat and regular your finished tabletop will be. The flatter and better aligned your boards are when they’re in the clamps, the happier you’ll be later. This is where end clamps and gluing cauls can help.
With all boards sitting in your main pipe clamps ready to come together under pressure, apply smaller clamps across each joint at all board ends. This aligns the boards perfectly, at least at the ends, anyway. Depending on how your boards behave along the rest of their length, you may or may not need cauls. These curved pieces of wood get clamped across the glue-up, top and bottom, aligning the boards vertically and minimizing steps between them. I use 1” x 4” lengths of hardwood for cauls, with one edge planed to a curve so the ends measure about 2 1/2” wide.
Clamp curved caul edges inwards so they align tabletop boards in the middle, then torque up the main clamps to draw the boards together. If the width of boards you’re using allow it, pre-glue boards for your tabletop in sections that are just narrow enough to fit within your thickness planer. Run these through the planer to clean and level the glue joints, then move back to clamps for final glue up. Working in stages like this reduces the number of glue joints you need to sand smooth and level later.
How to Build a Table Step#3: Leveling and Sanding
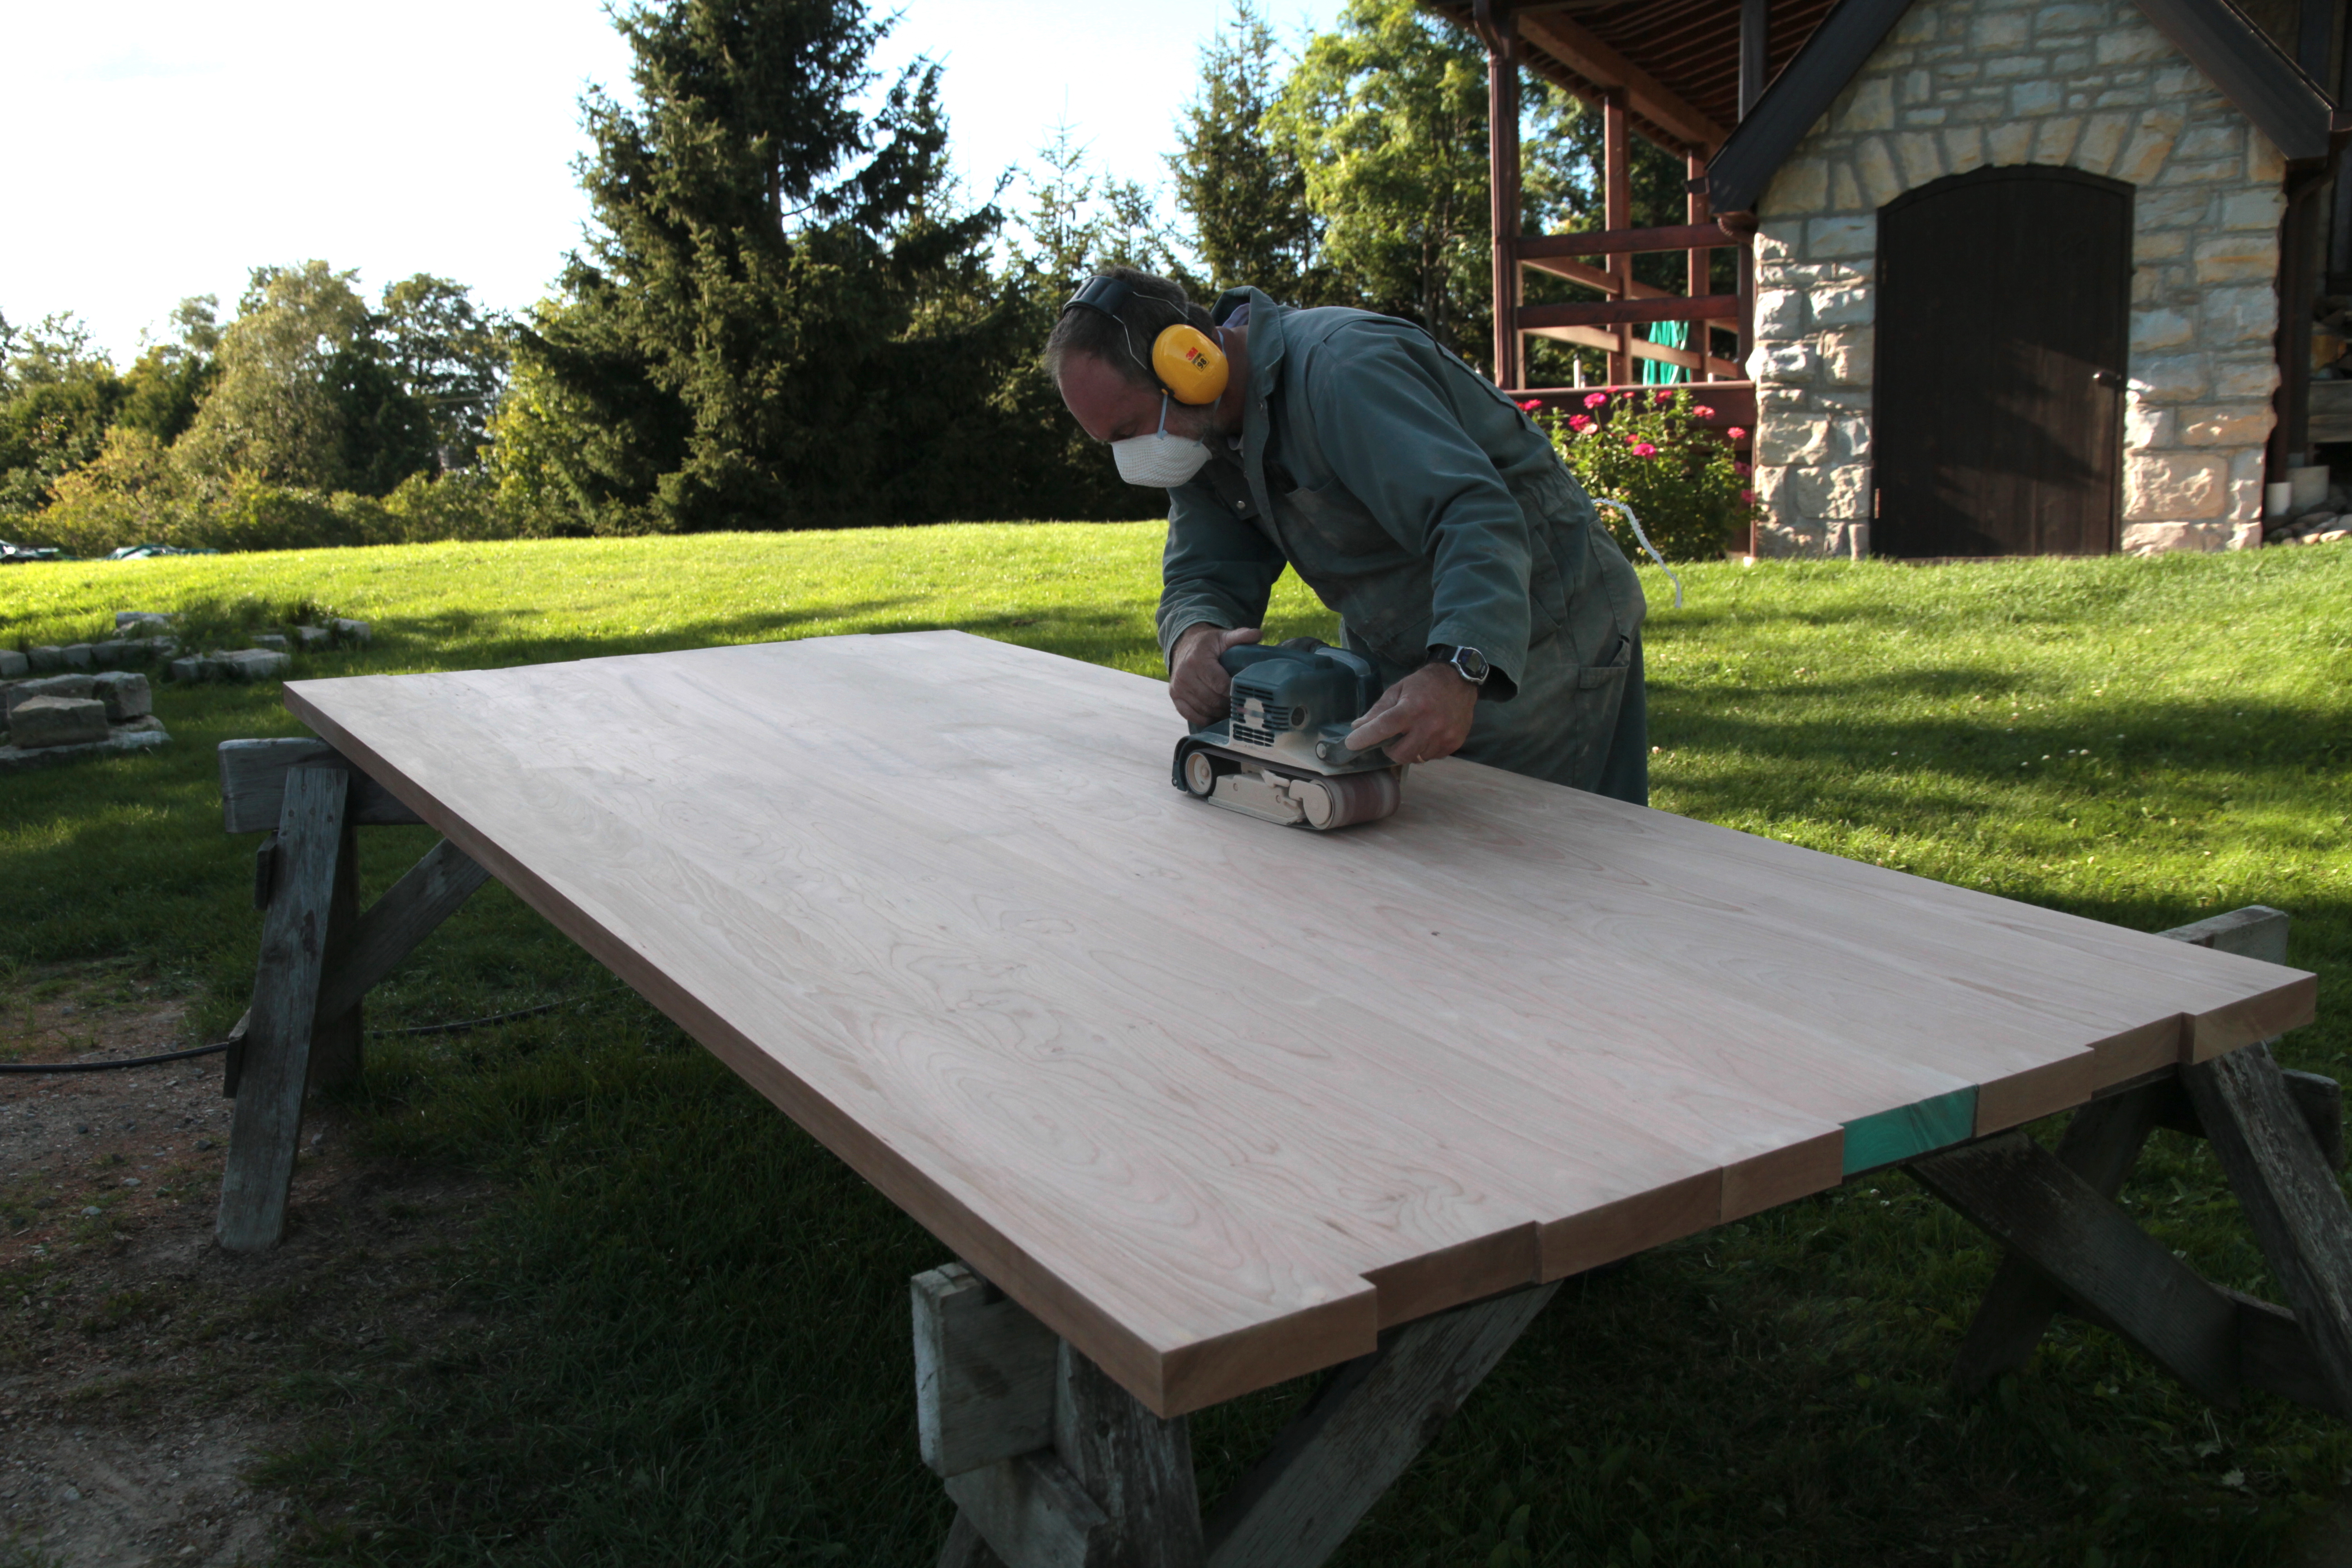 Even with the most careful glue-up job, there will be at least a little board-to-board misalignment when your tabletop comes out of the clamps. This is where cross-grain sanding helps. With an 80-grit abrasive in your belt sander, level your tabletop by working across the grain instead of parallel to it. This removes wood more quickly, making it easier to create flat results. Move to parallel-grain sanding with the 80-grit belt when all joints are flat, then switch to 120- and 180-grit belts, also run parallel to the grain.
Although it’s tempting to use a random orbit sander to smooth your table top at the final stages, I never do. Finish quality is the reason why. Random orbit sanders often leave behind swirl marks that don’t show up until finishing time. A better option is to complete the sanding process by hand, using 180-, then 220-grit paper only in the direction of wood grain. The finish of a tabletop is more closely examined than wood finishes anywhere else, so you need to eliminate all flaws.
Leave your tabletop longer than necessary until the sanding is done, then cut to final length. Most tabletops are too wide to trim on a tablesaw, even with a crosscut sled, and this is where I use a hand-held circular saw. Clamp a guide strip so it’s square to one edge, then follow it with your saw. Repeat the process on the other end, then carefully use your hand-held belt sander to remove any blade marks on edges. It sounds like a coarse process, but you can get great results this way.
Tabletop edges take a lot of wear, and rounding them helps the finish on edges to last longer. Even if you prefer the look of a square-edged tabletop (as I do), rounding over with a modest, 1/8” radius router bit does a lot to extend finish life.
How to Build a Table Step#4: Finishing
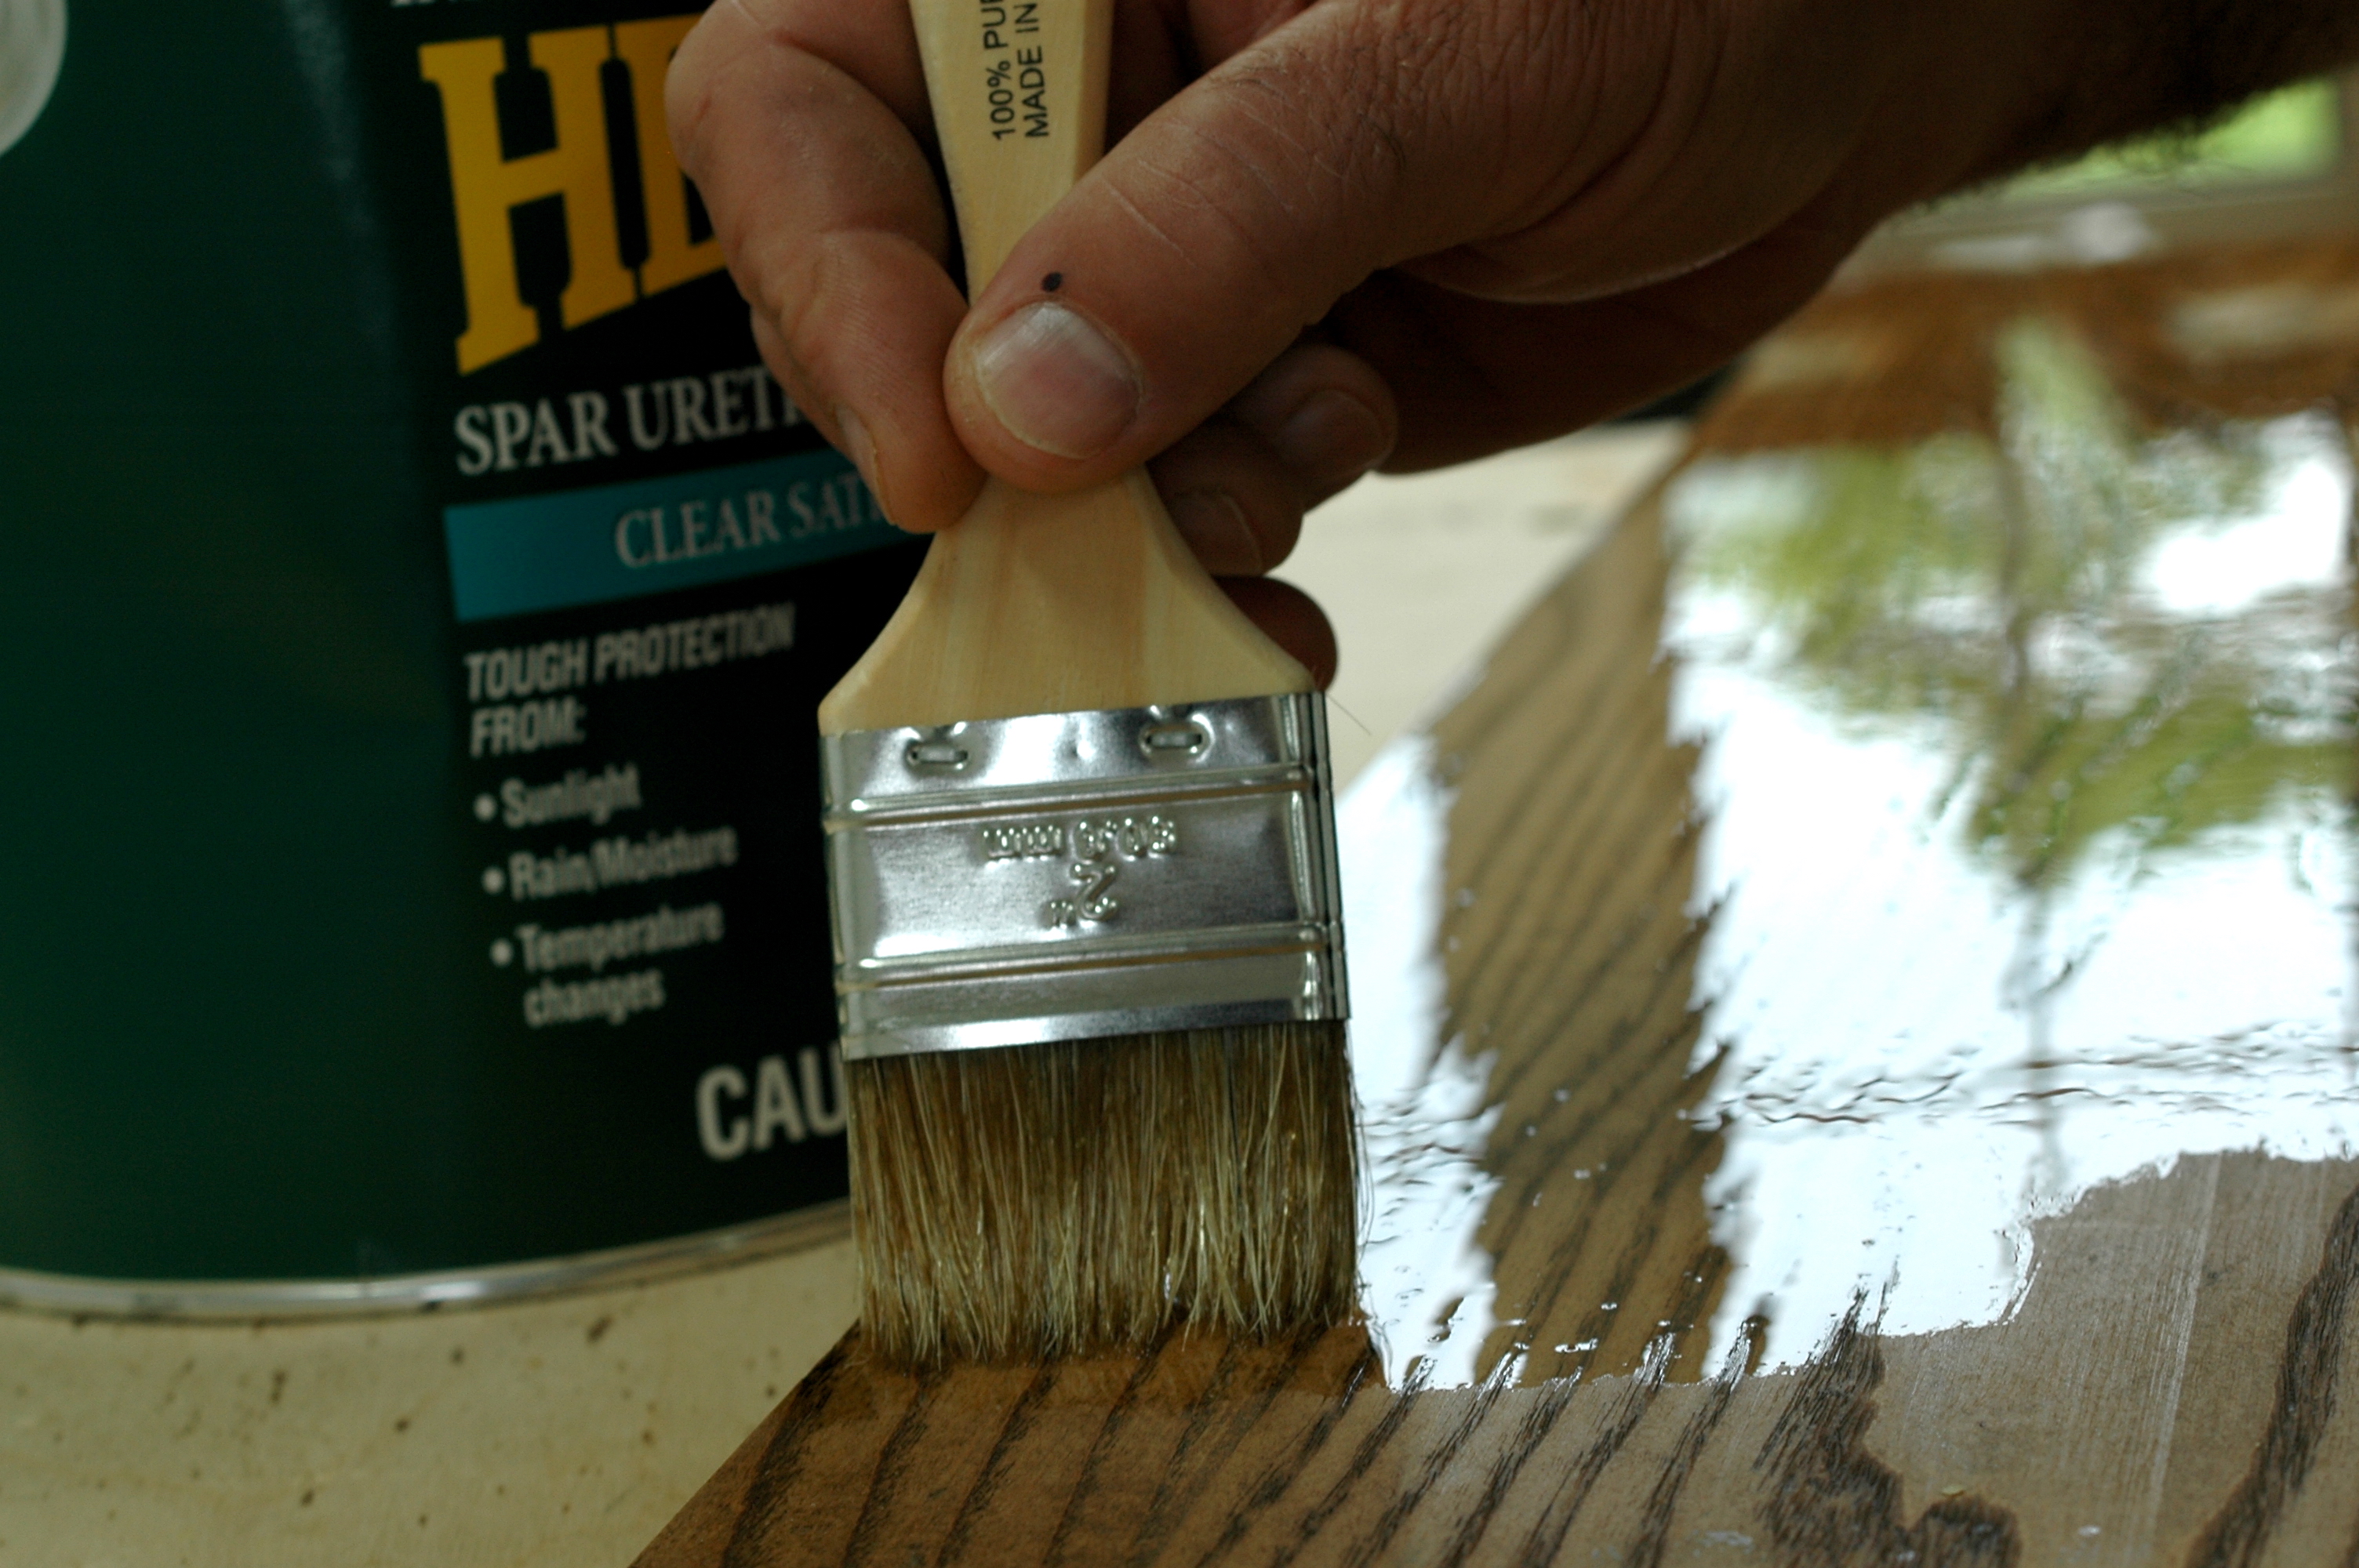 When it comes to choosing a finish there are two main choices. The typical approach of stain and urethane creates a smooth, wipeable surface, but when that finish eventually wears through, there’s no way of repairing it attractively. Sanding back to bare wood and refinishing is the only way to make it respectable again. Oil and wax finishes, on the other hand, take more time to apply initially, but they’re easily repaired and rejuvenated with the tabletop in place. Regular reapplication works just fine.
Want to see how to apply a very durable, beautiful and repairable oil finish on your table top? Click here for a detailed video tutorial.
Want glass-smooth urethane finish on your table top? Click here to watch an amazing, little-known trick for buffing polyurethane wood finishes. You’ll be amazed at the glass-smooth results you can achieve. This is one of my most popular videos.
Like all woodworking success, building a tabletop depends on properly completing each step before moving on. The only difference is that tabletops are probably the most obvious and prominent woodworking you’ll ever do. All the more reason to get things right.