 Wood floors are great, except for one thing. The inevitable dents and wear that set in with ordinary use looks pretty bad. This is especially true with floors that are stained dark, allowing light wood to show through in areas of damage. And if the ugly appearance wasn’t enough, repairing these trouble spots isn’t an option that most people think of. Refinishing or replacing are the typical solutions offered by flooring professionals, but this isn’t always necessary.
Even if a wood floor finish is badly damaged from unprotected chair legs, it may be possible to restore the finish inexpensively, without the cost and disruption of a full-blown sanding, staining and urethane job. Regardless of what you’ve got, do-it-yourself restoration is worth a try. Even if your floor still looks terrible afterwards, you’ve only risked a little labour and materials.
Light Sanding Does the Trick
The restoration process that I’ve used successfully involves lightly sanding and restaining the old floor before several new coats of urethane go down. Just to be safe, test the process in a small area first. You don’t want to go to a lot of 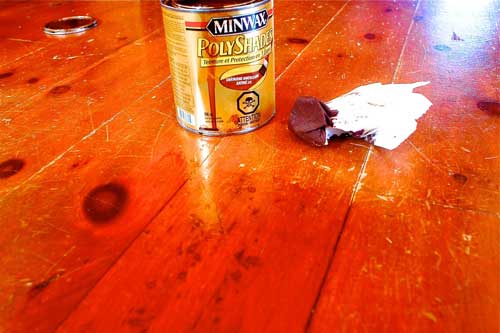 trouble without some assurance it will work to your satisfaction. Choose an area several feet square, then use a quarter-sheet hand-held electric finishing sander and 120-grit paper to slightly roughen the surface of the existing urethane. Next, grab a piece of the same kind of sandpaper and use it by hand to smoothen the transition between the existing old finish that’ll remain and those bare areas worn right through to the wood. It doesn’t take much sanding time – perhaps 30 minutes to do a 15 x 20-foot room. If you’ve done things right, the bare areas will look fairly fresh, while the remaining finish will be somewhat cloudy and dusty looking. Your floor won’t look terrific yet, but don’t despair. Things are about the get a whole lot better.
Restore the Colour
The trick now is to rub the right colour stain into the entire floor area, wiping off the excess after it has soaked in to bare spots. Although it’s not made specifically for this purpose, my favourite floor-fixing stain is Minwax’s Polyshades. It’s a combination urethane and stain that’s designed to create a complete, one-product wood finish, though I’m only using it for colour in this application. If you can’t find an exact match for the colour of your existing floor, choose one shade darker. Polyshades comes in lots of different colours, and its thick consistency makes it perfect for this job. If you’ve applied it correctly you’ll have an even coloured floor, with all those areas of wear and dents the same colour as 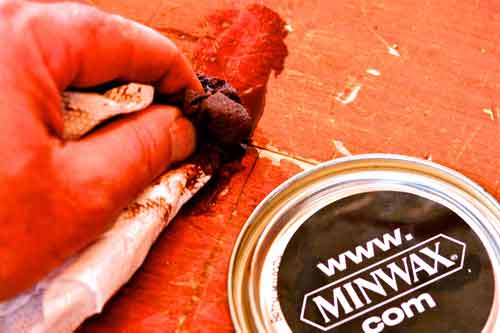 undamaged areas. In fact, I find that the dents actually improve the look of the floor when they soak up stain. It gives the wood an antique, distressed look. Vacuum the floor diligently before staining, removing any dirt and dust.
Seal the Surface
Let Polyshades dry over night, then brush on one coat of oil-based satin urethane over the entire floor. When it’s completely dry, sand lightly with 240-grit sandpaper, vacuum, then apply another coat of urethane. Sand the floor again when dry, then apply a final coat of urethane.
This remedial option doesn’t always fix things up to everyone’s satisfaction, but it’s always worked well for me. I’ve used it to successfully restore very badly worn floors, without the need for major sanding. Even if you don’t like the results, not much is lost by trying, especially if you’ve experimented in a small area.
The best option I know of for protecting restored wood floors from chair leg scratches is Stanley floor protectors. They have a felt disk bonded to a flexible, synthetic sleeve that goes over the end of chair legs. They’re much more durable than self-sticking felt disks.