A warm floor means warm feet, and warm feet means a warm body. That’s the philosophy behind radiant infloor heating systems, and I’ve become convinced they’re the best way to heat your home. Trouble is, few houses have the necessary equipment, mine included. When I designed and built my place twenty-something years ago, infloor heating wasn’t mainstream enough for me to take it seriously. That was a mistake on my part, and though I now wish I’d installed infloor heating originally, it’s not too late. I’ve spent the last few years planning a strategy to make up for my poor judgement, and I’m putting it in place right now. If you long for toasty toes, then perhaps what I’ve learned can help you.
After looking closely at all the options, I’ve opted for a hydronic infloor heating system. It uses a network of flexible plastic pipes made of something called PEX (cross-linked polyethylene) to channel water of about 120ºF underneath the wooden floor structure, turning the entire floor into a kind of radiator. There are a handful of companies that offer the necessary hardware, but I’ve chosen to go with Uponor (888.994.7726). They’ve got a strong Canadian presence, and their product line is especially well suited to the retrofit situation I’ve got.
All radiant infloor heating installations begin with a CAD drawing for laying out the pipes, and this means more than just one continuous loop of pipe snaking within the floor frame. To operate most efficiently, each pipe loop mustn’t exceed some maximum length. In the case of the 1/2” diameter pipe that’s typical for these installations, that’s 300 feet. The layout plan provided by Uponor for the first floor of my place includes nine different loops over the 30-foot x 40-foot floor area. Besides the need to keep loop length fairly short for thermodynamic reasons, there’s an immediately practical advantage, too. The ever-present prospect of pipes tangling as they go up means that shorter lengths are easier to handle.
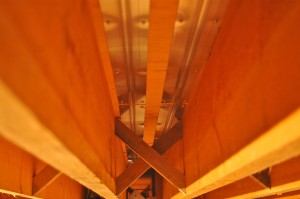
 Installing an infloor heating system is not something Uponor recommends as a DIY job. That said, an understanding of the system is helpful as you check out various contractors and evaluate their proposals. In my case I’m fastening two 4” wide strips of rigid aluminum extrusion along the length of each joist cavity, secured tightly to the plywood above with short screws. These plates include a curved trough designed to hold the 1/2” diameter flexible pipe that the hot water flows through. The aluminum conducts the heat away from the pipe, delivering it to a wide area of the plywood above. Although there’s a total of 1 1/2 inches of wood flooring sitting above these plates, heat transfer upwards still works fine as long as the underside of the pipes is insulated sufficiently. That’s key.
 My insulation plan involves applying spray foam to the underside of the subfloor and over the pipes and heat transfer plates after all piping is installed. The traditional rule of thumb for this situation is that the insulation value below the pipes must be at least five times greater than the insulation of the floor itself above the pipes. Wood has an insulating value of about R-1 per inch, so insulation below the pipes in my case needs to be at least R-7.5. That said, there’s an upcoming revision to the National Building Code that will require a minimum insulation value of R-12 in joist cavities below heating pipes, so I’ll go with that. I’ve used Tiger Foam (888.844.3736) in the past for insulation work, and it’s ideal for this application. The fan-shaped spray stream comes out of a hand-held gun, hardening on the surface in a minute or two.
There’s more to hydronic infloor heating systems than just pipes in your floor, and I’ll tell you more later as I learn more about the boiler, controls, insulation and what it finally feels like to have warm toes all the time.