 Back in 1967, the Delta power tool people started something big, and like most world-changing events it looked pretty insignificant at first. The centre of the revolution was something called the Power Miter Box, and it was the great granddaddy of today’s ubiquitous mitre saw. From the humble beginnings of a tool that could just barely crosscut a 2×4 at 45 degrees, the mitre saw has revolutionized the way we build for one simple reason. Today’s machines are stunningly effective. They allow complicated, highly precise cuts to be banged out by just about anyone, and they’re doing it at lower cost and in less time than ever. That’s one reason I’m convinced that the technology behind this class of tool is prime. Sure, minor advancements might come along over the next few years, but not much is going to change with mitre saws because tool designers have already packed so much utility into the format right now. It’s a good time to invest in mitre saw technology because R&D advancements have really paid off.
All of this is welcome news for people who work with wood, but there’s a problem. Choosing the right mitre saw isn’t as easy as using one. And solving this problem is where a well-informed three-step selection process can help. Armed with an overview of all the main options and features, you’ll be prepared to make the kind of optimal choice that boosts your building output for years to come.
The Big Three Choices
When it comes to choosing a machine, you’ve got three main features to decide on: sliding or fixed motor assembly; compound versus non-compound bevel capacity; and blade diameter. An informed selection is the best way to avoid the regret of buying the wrong saw just before the real thing shows up in the back of your grinning buddy’s truck.
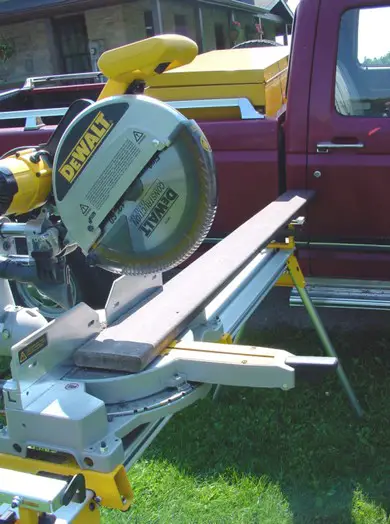
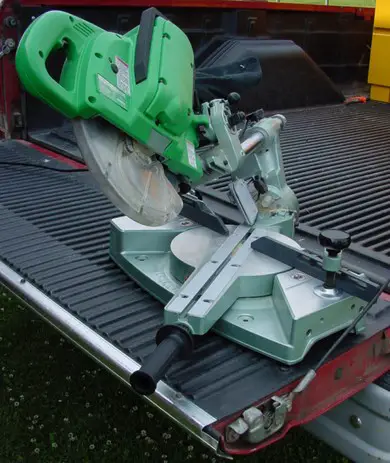
 While it’s true that Delta was the father of the mitre saw revolution, Hitachi raised the tool to the level of performance that’s now making such a big difference on construction sites worldwide. The ‘green line’ was the first to offer a sliding motor/blade assembly that allowed their tool to crosscut 2x12s with ease, even while only spinning a tiny 8 1/2” blade. Today all major tool manufacturers offer sliding mitre saw configurations, though there are many non-sliding models out there, too. So how do you choose?
All else being equal, you’ll pay more for a sliding mitre saw than you would a non-sliding model. You’ll also have to endure slightly less accuracy with a sliding machine. The mechanism that allows the motor/blade assembly to move back and forth can sometimes introduce small amounts of play to the spinning blade. All this said, sliding mitre saws still offer excellent performance for all but the most demanding trim installers because of one thing: versatility.
Even if you don’t imagine you’ll need to crosscut big wood, you’d be surprised how nice it is to have that ability when the time comes. And once you’ve got it, you’ll wonder how you managed otherwise. That’s why sliding saws are valued so highly by their owners. Few would ever go back to a non-sliding model.
Another feature that goes hand-in-hand with sliding capabilities is the ability to cut compound angles. This means the motor/blade assembly can tilt from a vertical position, allowing easy beveled cuts, even while you’re cutting mitres at the same time. If you’ve ever wondered why radial arm saws are on the endangered species list these days, this is it. The ability to cut compound angles in a portable situation is unbeatable when it comes to preparing hip and valley rafters as well as porch and gazebo roof components. It also makes it possible to accurately cut exceptionally wide crown molding while your wood sits flat and safe on your saw. Some sliders even come with preset cutting positions designed especially to ease flat-crown work.
 For almost 10 years after sliding compound mitre saws hit the market, all new models could only tilt their motor/blade assembly in one direction – usually to the left. In practice this meant some cuts could be completed with the work piece in the usual position, while others had to be put into the saw upside down and backwards to get the cut right. Results were always possible with single tilt models, though the mental gymnastics could be a pain, and risky, too.
Today’s top-of-the-line compound mitre saws solve this problem by tilting both to the left and the right. And though this used to add a steep price premium to models that offered the feature, not so any more. If you’re opting for a compound saw, consider the value of dual beveling capacity. It’s the best.
Of all the mitre saw features available, blade size is less important to performance than you might think. Right now you’ll find saws spinning 8 1/2”, 10” and 12” blades, and there are two areas where this exerts an influence: smoothness of cut, and the physical size of the overall machine. If you’ll be moving your saw around a lot, perhaps doing small jobs and light framing work out of the back of a truck, then an 8 1/2” saw will be your lightest, most portable option. If you need a rock-solid, wobble-proof blade for the cleanest trim work in a cabinet shop setting, then a 12” diameter blade is what you need. Ten-inch blades are handy when you want to interchange blades with a standard table saw. Although you’ll pay more for larger blades, today’s carbide blades can be resharpened often enough that this extra cost isn’t much of an issue over the life of the hardware. For more on choosing the best after-market mitre saw blades, check out Blade Upgrade.
Tweaked to Perfection
Speed and accuracy are the two virtues offered by mitre saws, but for that to actually happen for you in the field you need to have faith in your machine. That’s why it’s essential that any new saw be checked for accurate output. You must know for sure that so-called square cuts are actually bang-on 90 degrees, and an engineer’s square is the tool of choice for checking out mitre saws and all other precision woodworking power tools in this way.
An engineer’s square is an all-metal machine shop tool that’s accurate to within one or two 1/1000s of an inch over the length of the blade. But to realize the full accuracy of this as a reference tool in a woodworking situation, it’s best to use the square to measure cutting results, not the machine or blade. Start by crosscutting a 2×6 at what you hope will be 90 degrees, then measure the actual edge with your engineer’s square. Don’t worry about the vertical accuracy of the cut just yet. That comes next. All mitre saws let you adjust cuts so they jive with the angle scale on the machine, and with preset cutting positions. Flip the 2×6 upright and repeat the process to check for accurate bevel cuts,
If you begin with any doubt that a good mitre saw is a worthwhile investment, don’t worry. Your misgivings will disappear. Chosen well, you’ll find the tool grows on you as it earns a place next to the old favourites in your tool collection. Good tools always do.
Sidebar: Blade Upgrade
Today’s mitre saws usually come from the factory spinning some kind of carbide blades, and while these stock blades are often good enough for basic applications, sometimes it pays to upgrade. As you choose, remember two things: 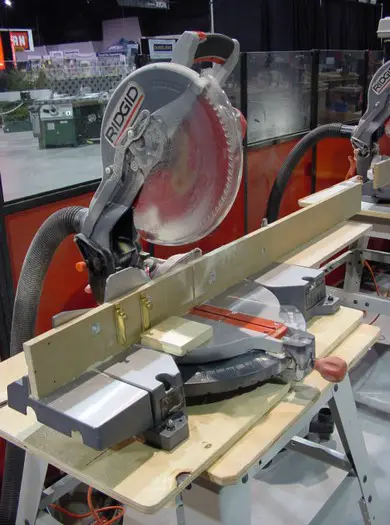 tooth shape and blade resonance. The industry standard for smooth crosscuts is a tooth shape called alternate top bevel (ATB). Look for 80 teeth on a typical high-end, 10” diameter crosscutting blade and you’ll be fine.
Also important, though not well understood yet, is the need for a blade that resists resonance. If a blade rings when sharply tapped as it sits with the centre hole on your finger, then chances are good that the blade will develop cut-distorting vibrations during use. Lately manufacturers have begun to use laser technology to cut resonance-dampening grooves in their blades, and this feature works. Look for it on the most stable blades available these days.
Sidebar: Workplace Support
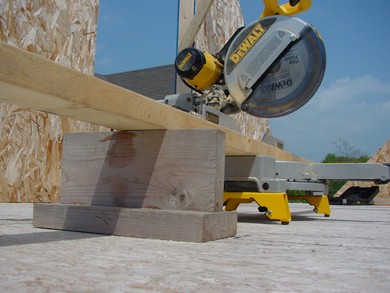
You won’t use any kind of mitre saw for long before you need to cut some long pieces of wood that stick out way beyond the saw. And in cases like these, work piece support is crucial for accuracy.
Tool manufacturers recognize the need for this feature and produce various support systems to keep both saw and wood off the ground and fully aligned. Most are worth the money, though there is a cheaper way.
Another option is the simple jobsite tee. I make mine from a couple of pieces of 2×6 screwed together and placed upside down on a subfloor. Make the overall height of your inverted tees match the height of your saw’s worktable and you can even cut 1/2” off the end of a 16 2×12 without hassles or helpers. For best results, pick a wide-open spot for your tees and screw them down to the subfloor to keep them upright as you move your wood around.