UPDATED: 5Apr2019: The more I work with wood, the less I like sawdust. Besides the health risks, it’s just plain bothersome. That’s why my ideal workshop experience is dust-free – or as close as possible to it. This is the motivation behind the workshop dust collection equipment I installed in my shop, and it’s been working well for me since 2009. If you’ve decided to get tough with dust (and you should), let me show you how I make my shop a cleaner, more enjoyable place to work.
Dust Collection System Feature#1: The Collector Itself
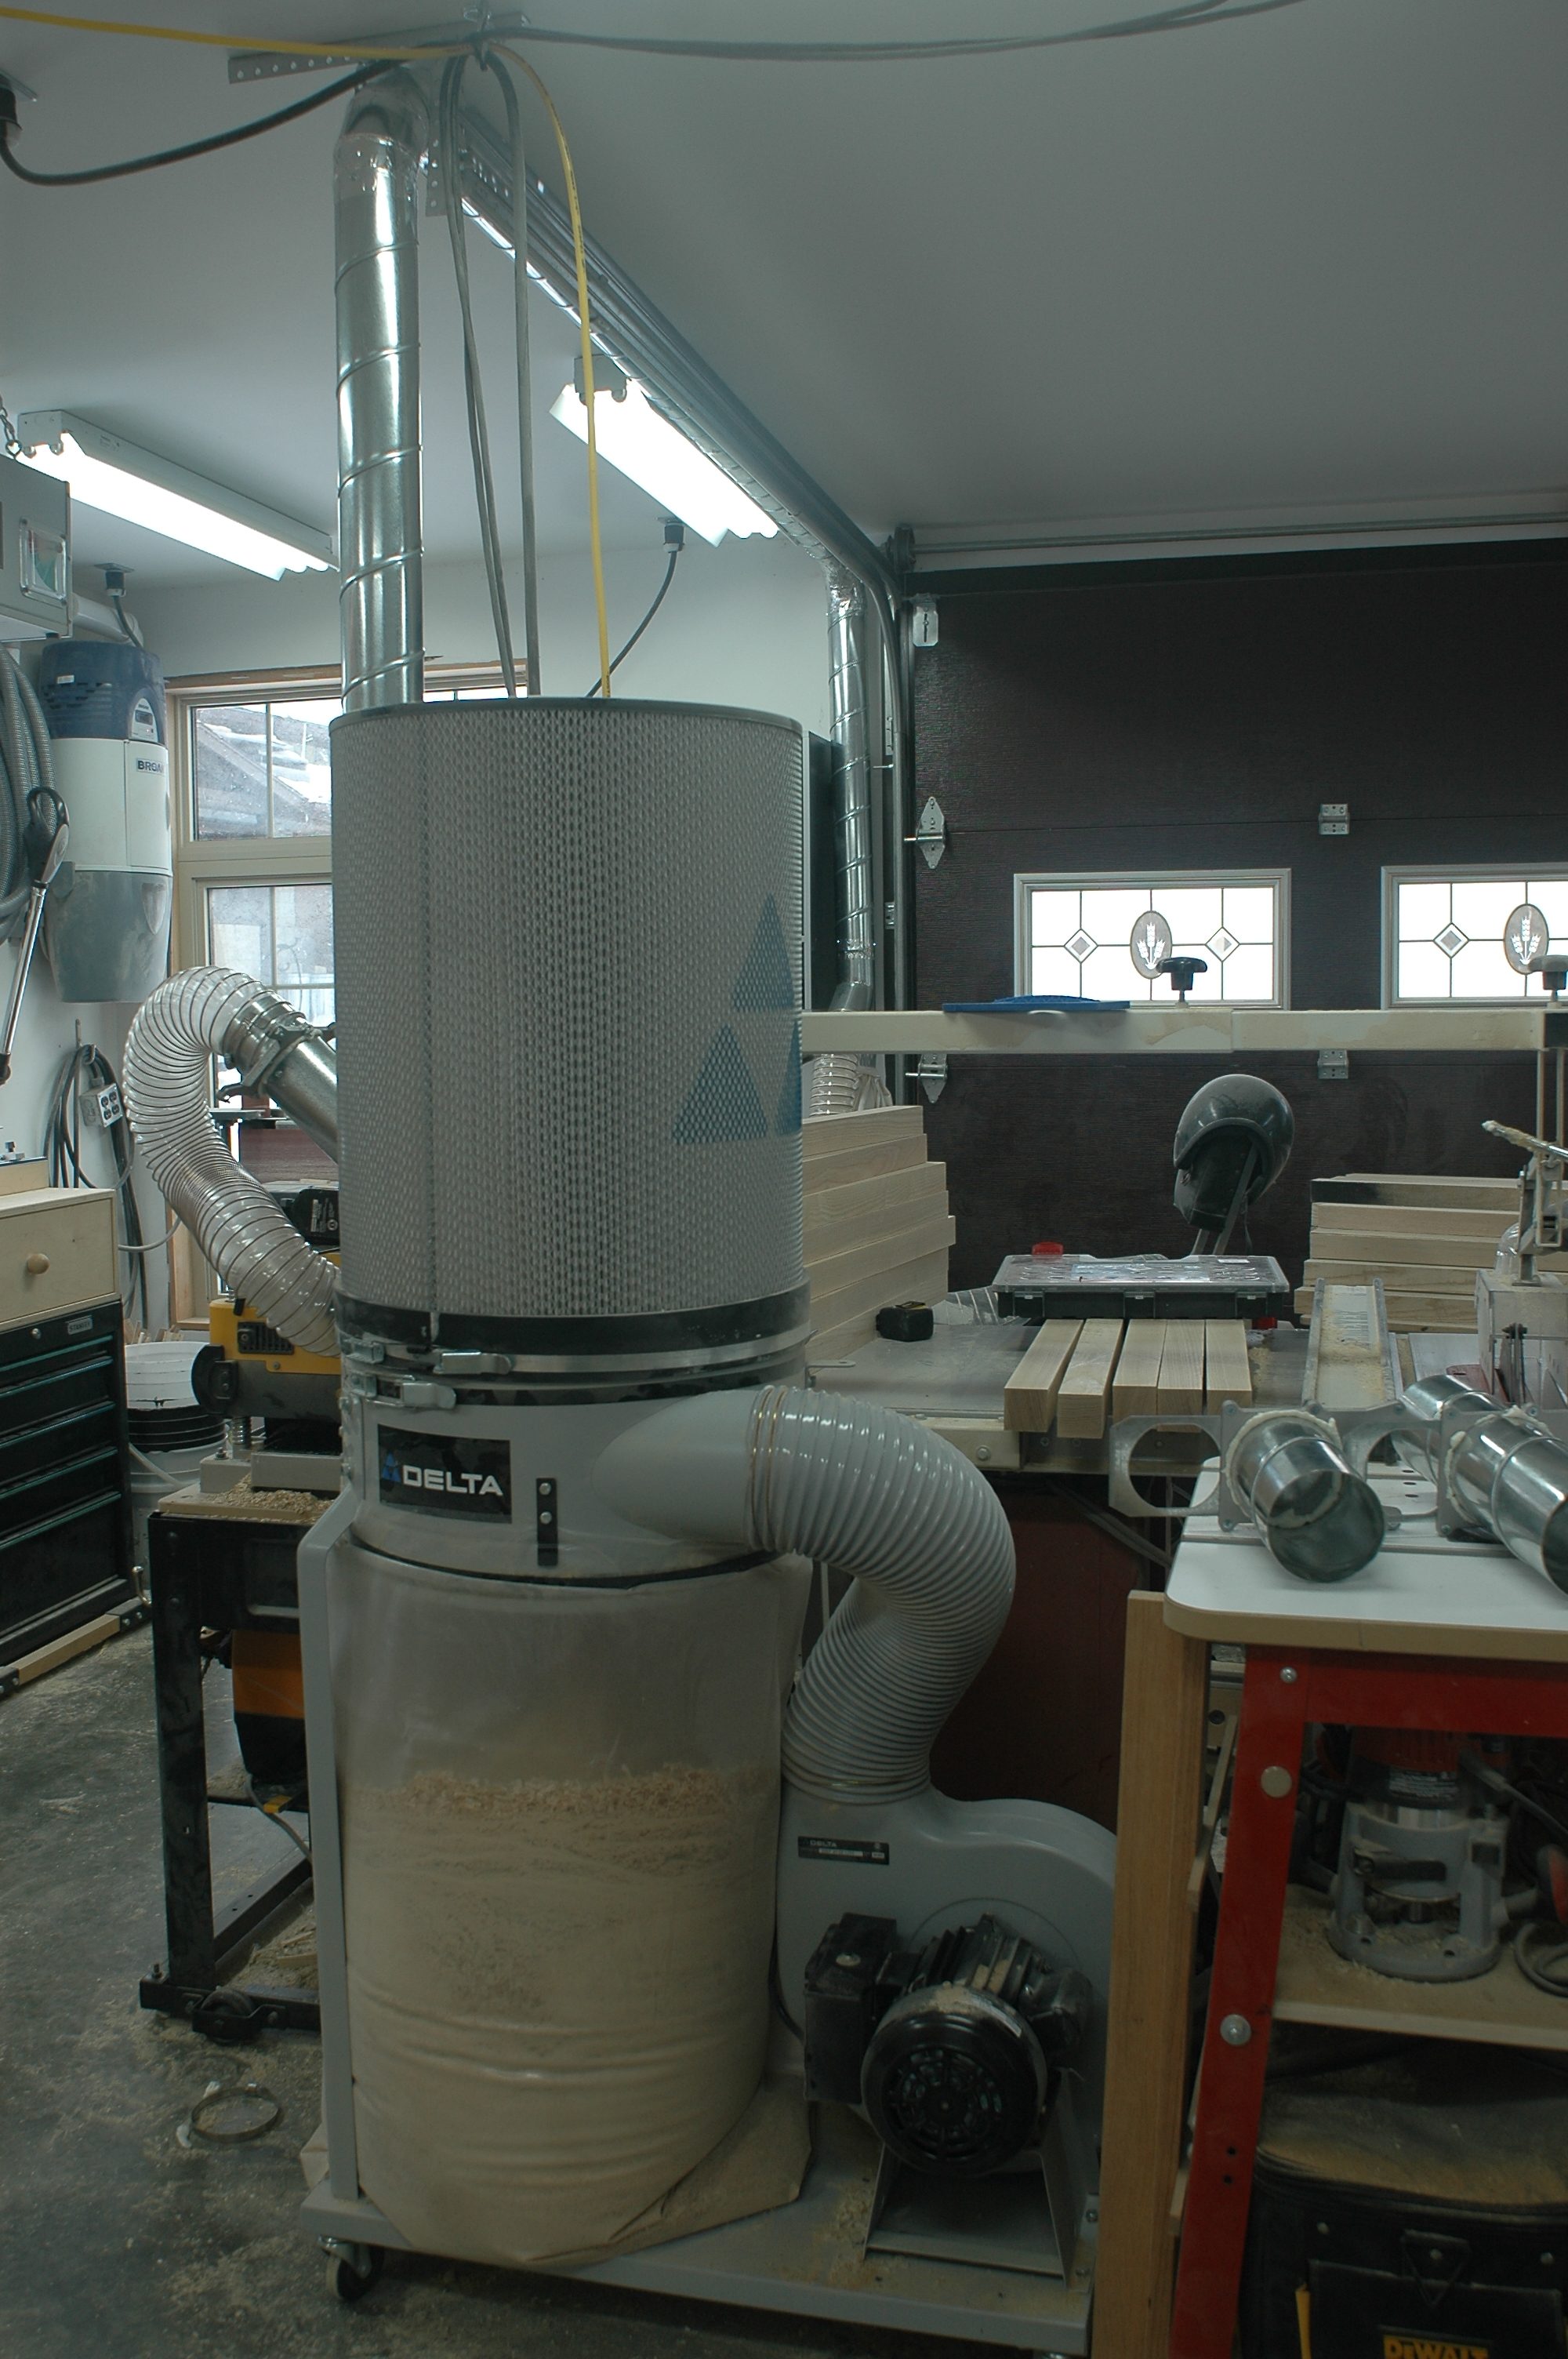 The heart of my workshop dust collection system is a Delta 1 1/2 hp, cartridge-filtered dust collector. I thought about installing a 3 hp unit, but the 1 1/2 hp model has proven to deliver more than enough suction, even for the dustiest of machines I use. If your duct runs are longer than about 15 feet, or you may have several people working at the same time, 3 hp is probably the way to go. Is your shop small? Unless it’s absolutely microscopic, I recommend starting with at least a 1 hp dust collector rather than a workshop vacuum. Dust collectors are quieter than a vac and they draw a much larger volume of air. The only thing a vacuum does better is drawing up piles of stuff up with a hose from the floor. Cleaning dusty machines and preparing projects for finishing are all better completed with a workshop vac because they move air much more quickly (though at a lower volume) than a dust collector.
Dust Collection System Feature#2: Switching & Location
Part of my system includes a wireless, automatic system that turns the dust collector ON and OFF as various woodworking machines are turned ON and OFF. Click here for a tour and video on the iVAC Pro system.
I nestled the dust collector right next to my largest dust-producing machines – the tablesaw, jointer and thickness planer. Grouping all four items tight together like this saves space and maximizes dust collection performance by keeping duct runs as short as possible. In fact, all these stationary tools are so close to the collector that they need nothing more than short lengths of 4” diameter flex hose for connections.
Dust Collection System Feature#3: Pipe & Blast Gates
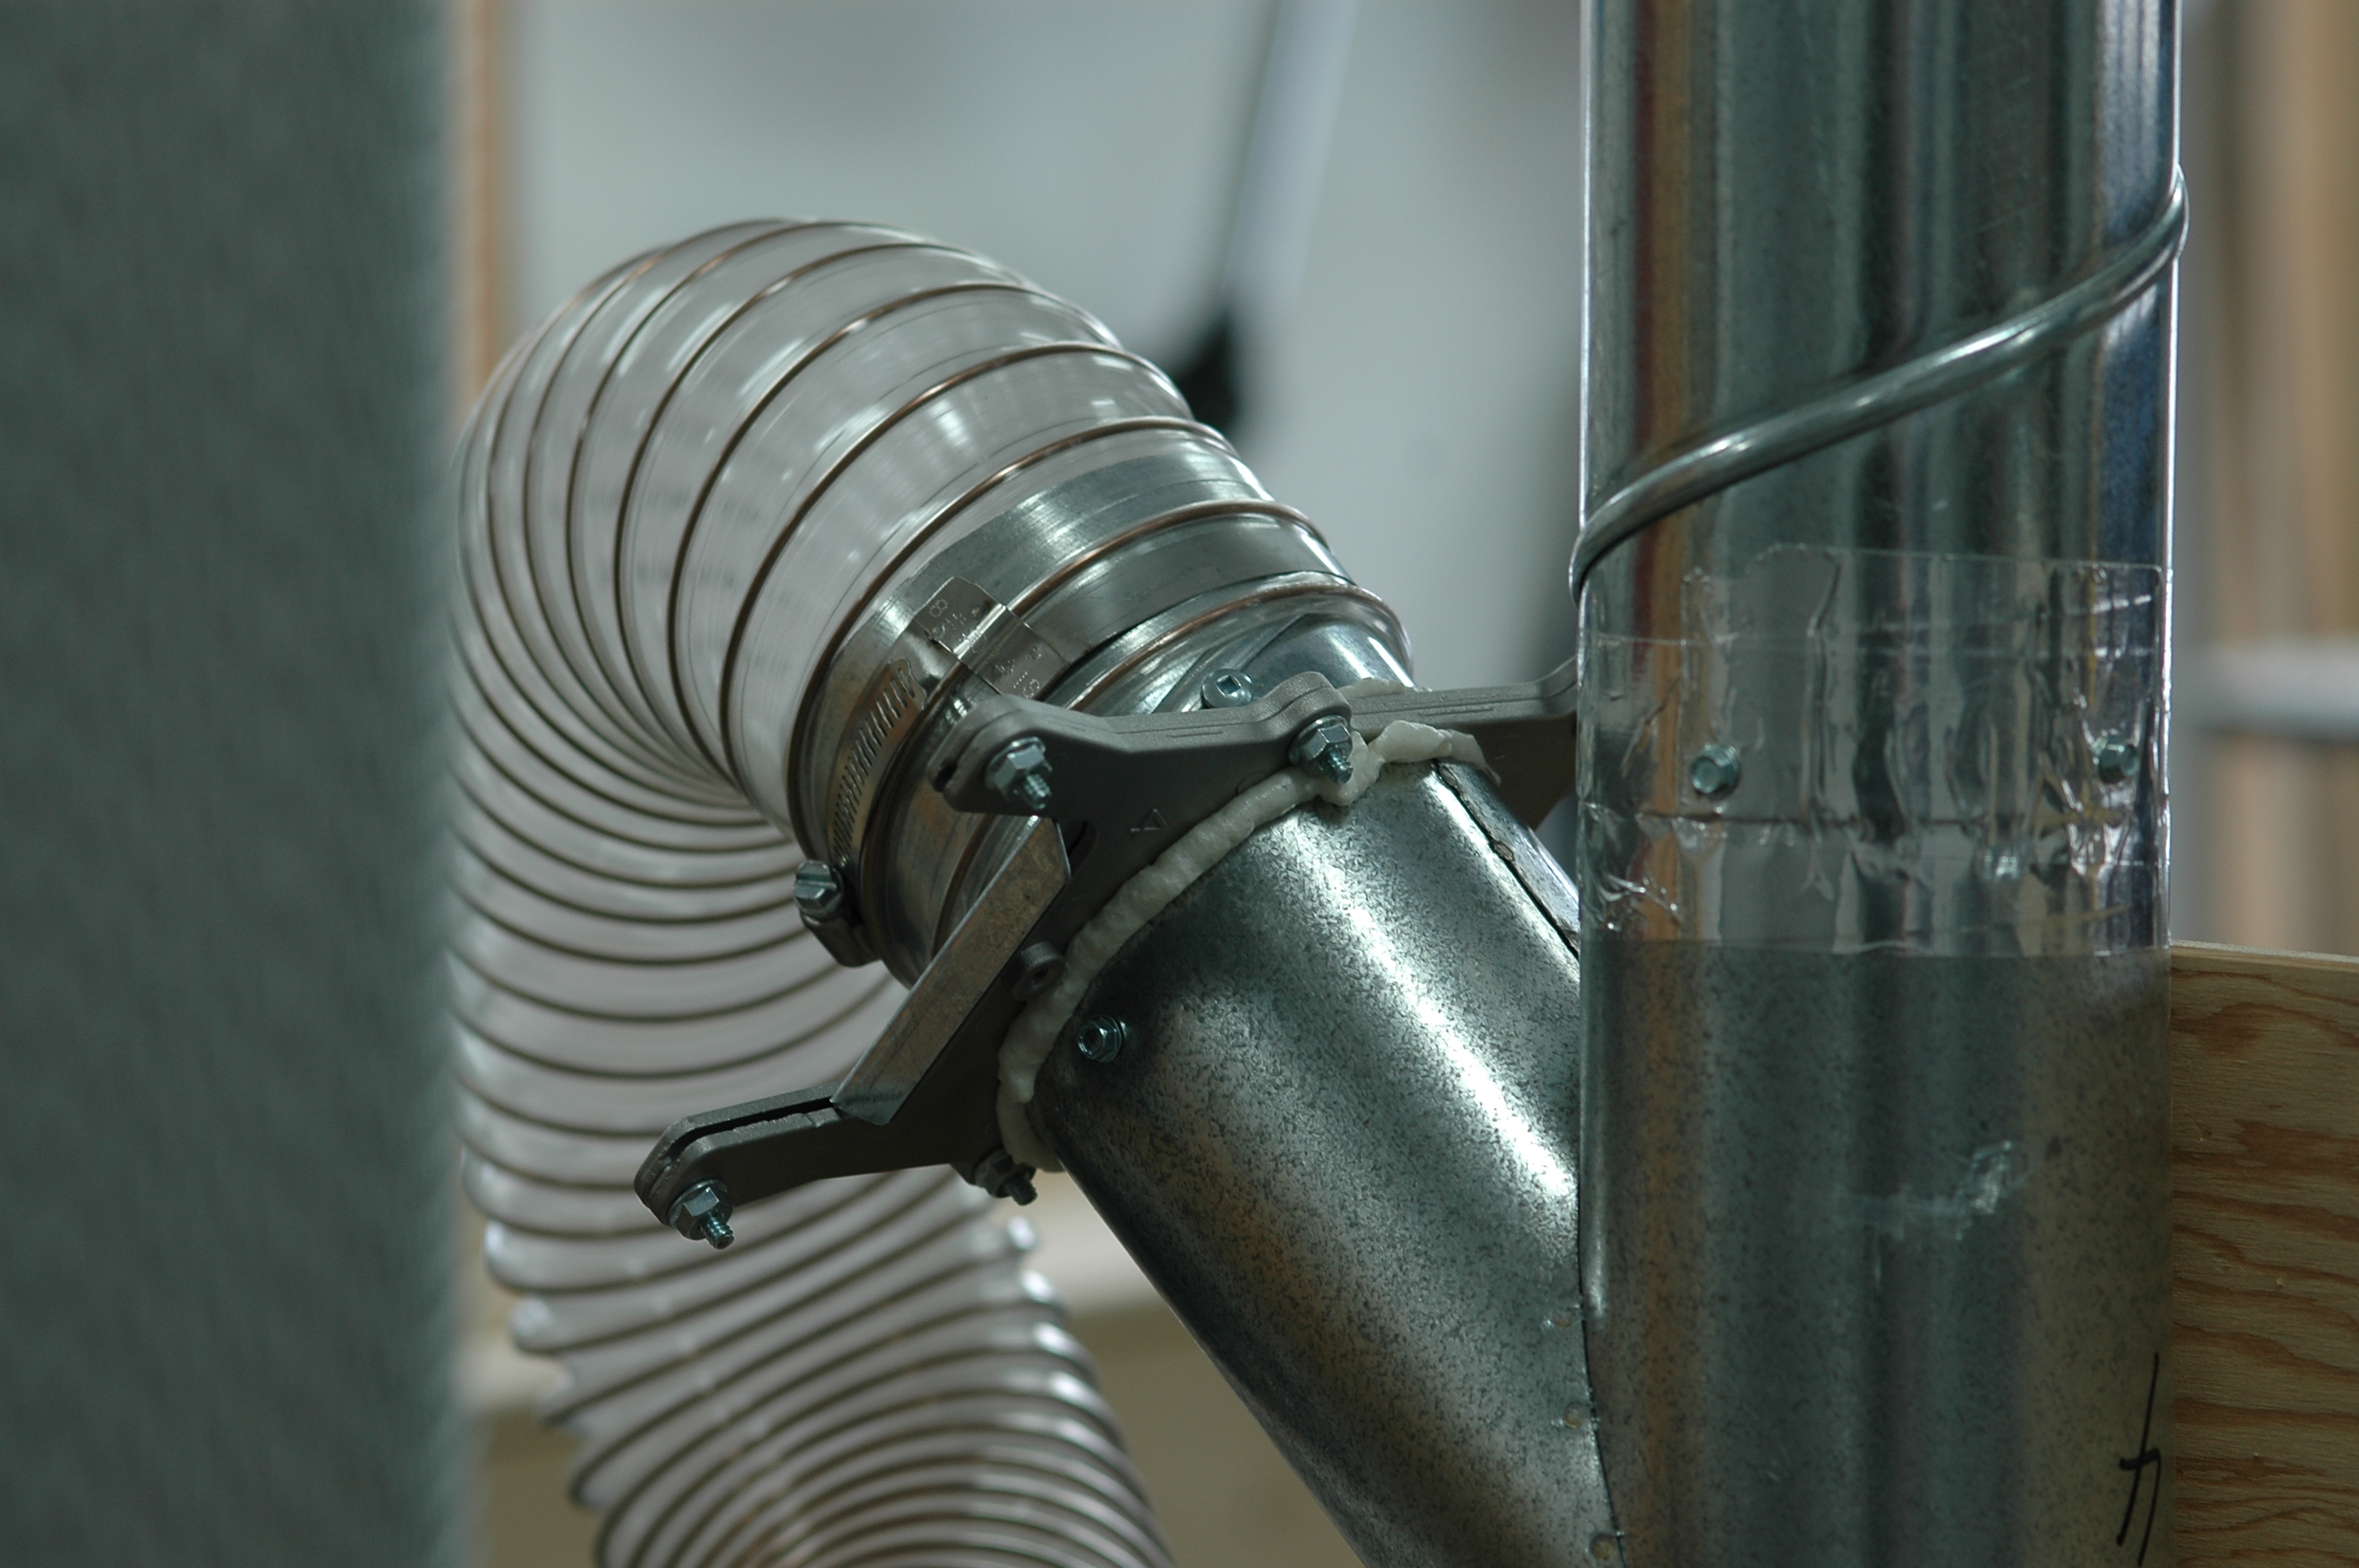
Most workshop dust collection systems need rigid pipe somewhere, but no matter how much or how little you’ve got, flex hose is the best way to make final connections to machines. It makes precise machine position on the floor non-critical, and it helps isolate vibration from resonating in any metal collection pipes. There are a handful of different kinds of flex hose on the market, but my favourite is polyurethane. It’s exceptionally flexible, clear and amazingly tough. I buy mine from Lee Valley Tools here. When it comes to securing flex pipe to a machine or the end of rigid pipe, I’ve found that a particular kind of screw clamp works best. It’s called a bridge clamp, and includes a small metal plate that’s bent to arch over the spiral reinforcing coil that’s part of every kind of flex hose. Bridge clamps work exceptionally well.
 Blast gates are sliding valves that allow suction to be directed to whichever machine you’re using. I don’t always find it necessary to isolate suction only to the machine I’m working with, but it is useful when I’m generating a lot of shavings with my jointer or thick dust with stationary edge sander. That’s why every machine should have its own blast gate, and there’s one particular kind I find that works best.
It’s an all-metal design, with an OPEN/CLOSED slide that automatically clears away any dust that accumulates in the groove where the slide travels. The only problem with this design is the short flanges on either end of the gate. They’re not long enough to reliably connect to flex hose on their own. You can solve this problem by using self-threading screws and expanding polyurethane foam to secure a 3” or 4” length of metal pipe to each end of the blast gate, making it easy to secure flexible duct connections. That’s what you see here.
If part of your ducting is longer than about five or six feet, or it needs to travel up and over work areas (as mine does), then metal duct is the way to go. Its smooth walls deliver more suction than flex hose over longer distances, and rigid ducting resists sagging, too. Some suppliers offer rigid plastic ducting, but I don’t like it. Besides building up significant charges of static electricity, plastic reduces air flow significantly compared with metal. Just understand that ordinary, 30-gauge household-grade metal ventilation duct isn’t strong enough for reliable use as part of a dust collection system. It can collapse if you accidentally run the collector with all the blast gates closed, and that’s why you need to consider one of two stronger options.
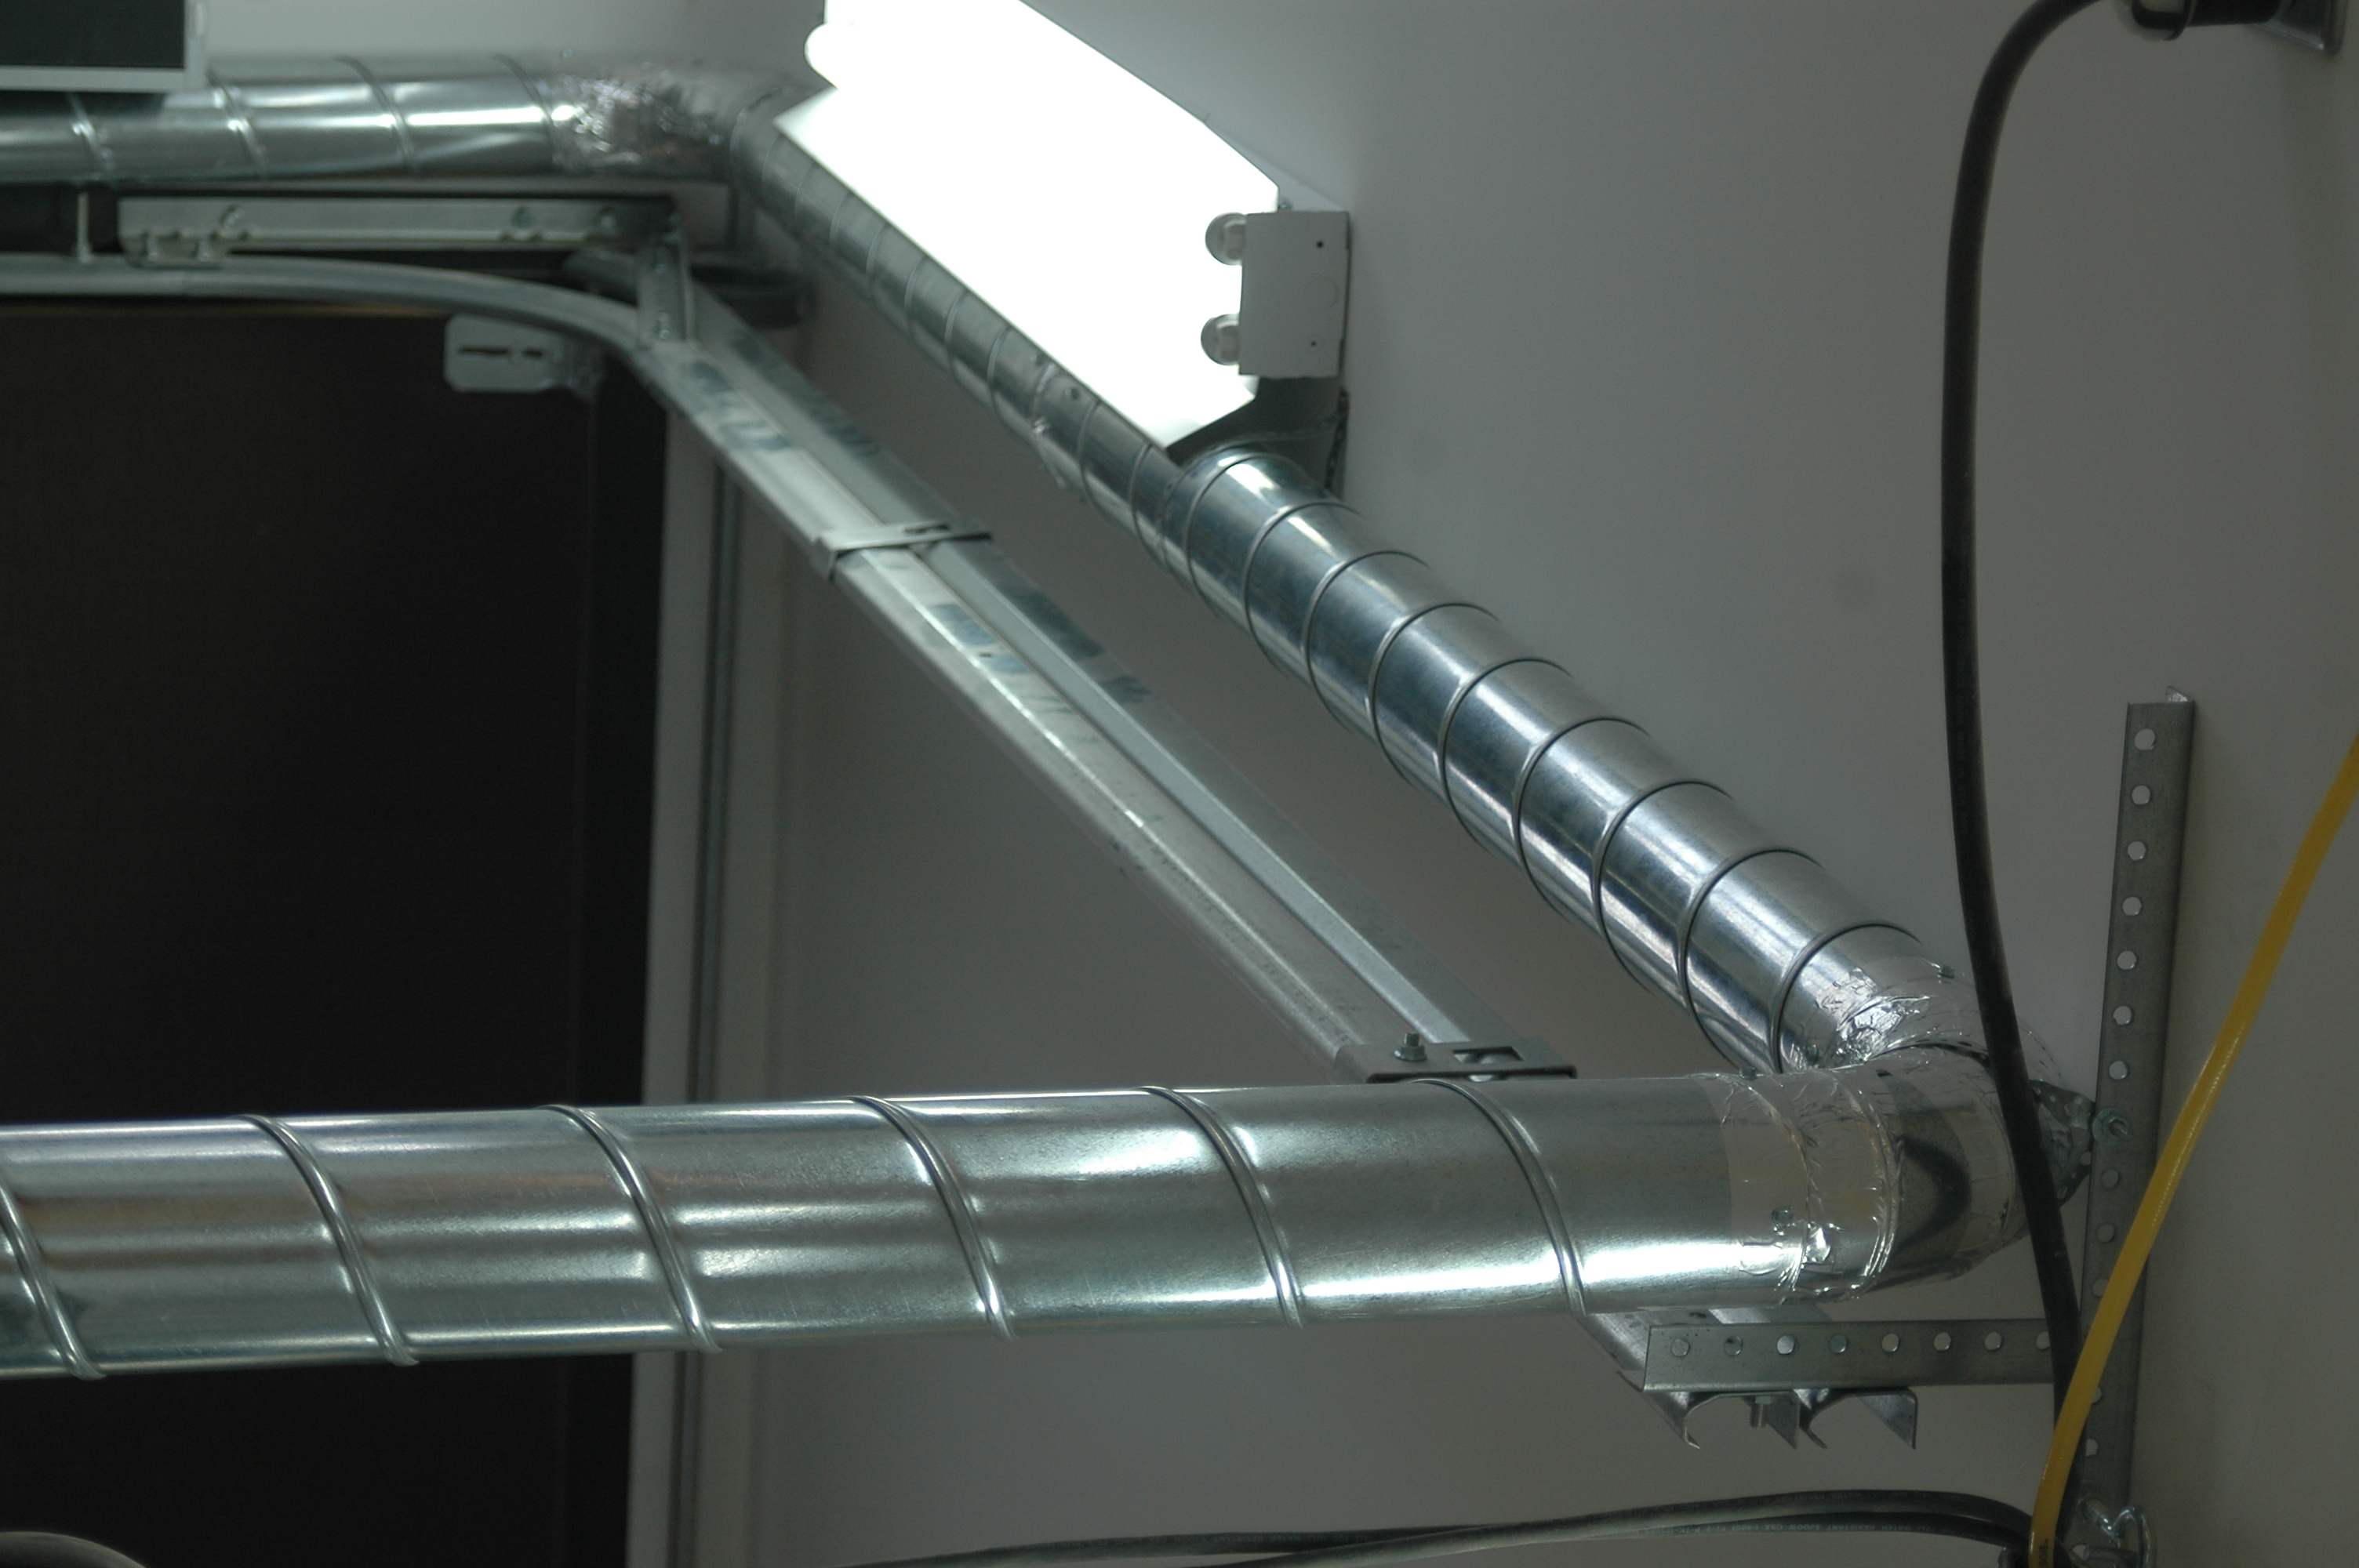 Spiral metal pipe is my personal favourite for wood shop ducts. Thick walls make it exceptionally strong, and well able to solidly anchor screws connecting duct joints. The main hitch with spiral pipe is finding the stuff. I bought mine online from a US supplier – Oneida Air Systems (www.oneida-air.com; 800-732-4065). Delivery across the border to Canada was hassle free.
Another, easier-to-find option is thick-gauge metal duct made for heating and ventilation use. Twenty-four or 26-gauge snap-lock pipe is strong enough to resist vacuum collapse, even if it does look like its thinner 30-gauge cousin.
Dust Collection System Feature#4: Working With Ducting
Regardless of the pipe you use, making air-tight connections is key. This is where aluminum tape can’t be beat. Assemble the joint, then apply a couple of wraps of tape around the seam. If you’re using snap-lock pipe (it’s got a seam along the length of each piece), run a strip of tape down the snap joint, too, after it’s assembled. Aluminum tape is strong and resists creeping and peeling better than even the best duct tape. Drive self-drilling screws into the joint to lock it – three per joint – evenly spaced around the perimeter. Driving the screws after the tape makes for a neater job, since the tape doesn’t have to go over screw heads.
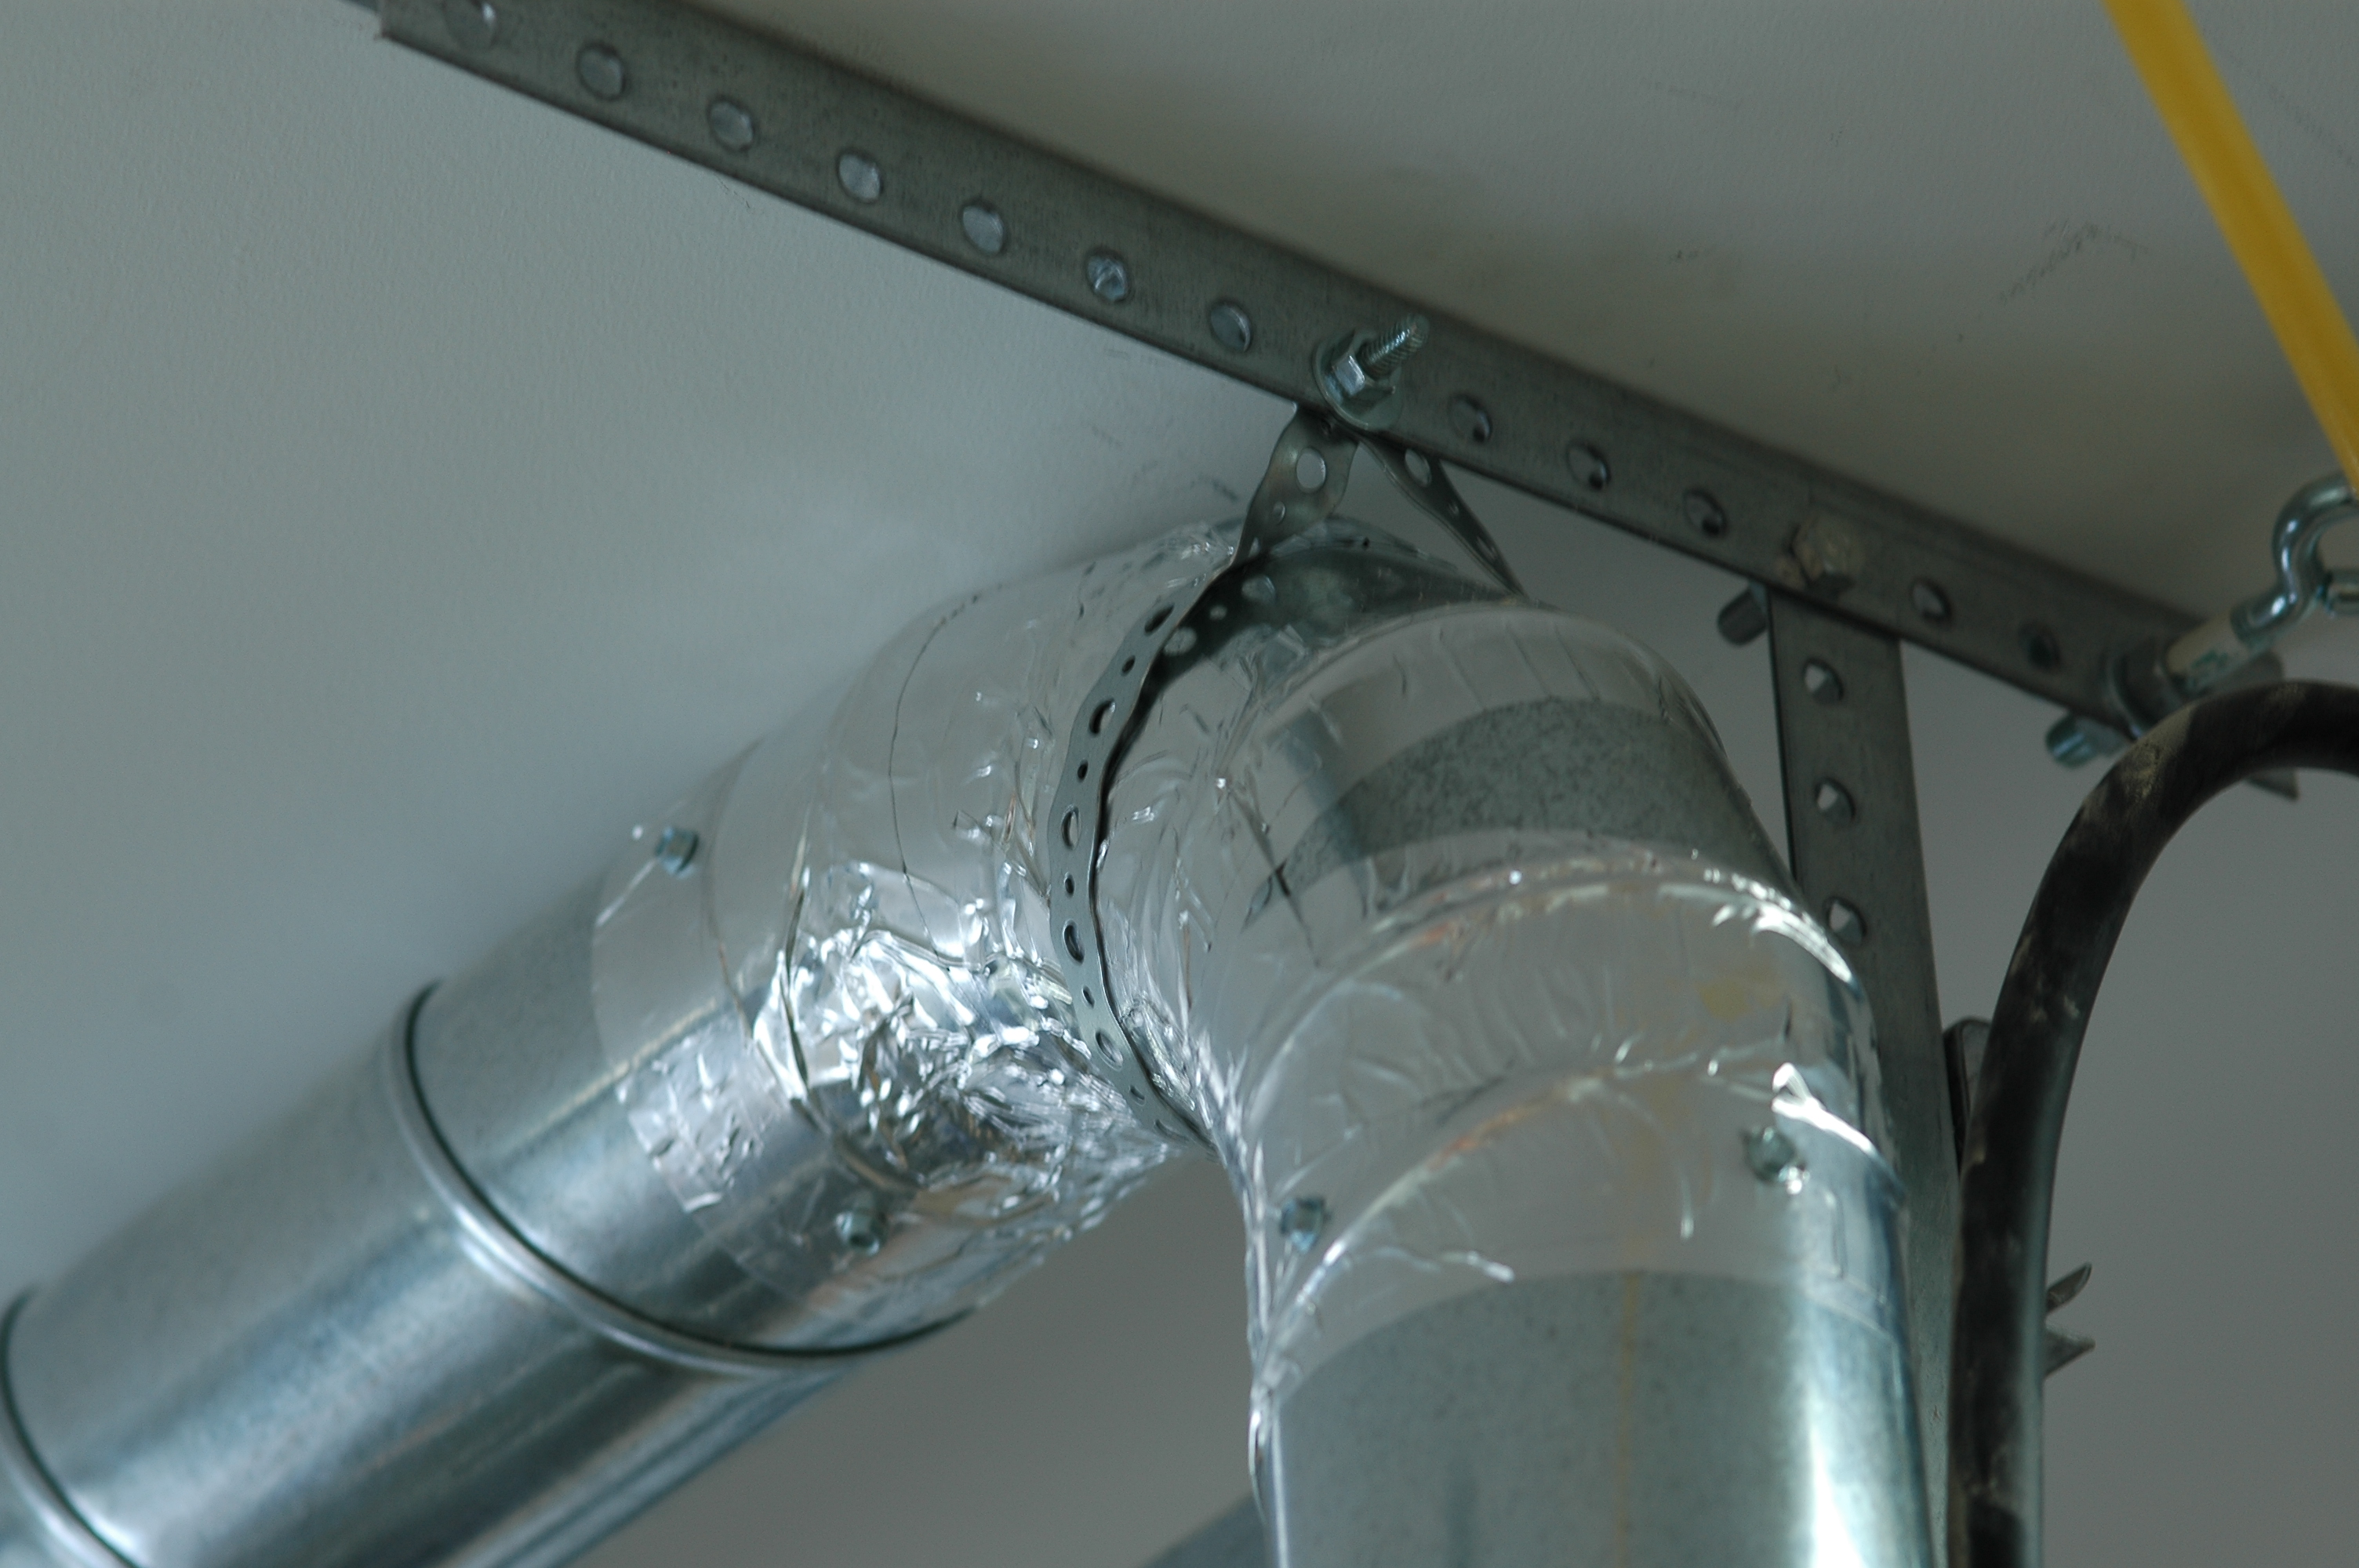 When it comes time to anchor rigid pipe on the wall or ceiling, flexible metal mounting straps work perfectly. It’s pre-punched to accept screws, and is strong yet cuts easily with aviation snips. Since all my pipe runs are short (the longest is about 10’, and there’s only one of those), I used four-inch ducts to connect each of my biggest machines to the dust collector. If you have longer runs, consider using a 6” main line, with 4” diameter pipes feeding into it. In most cases you’ll also have need for a little 2 1/2” dia. dust hose as part of the system. In my shop there are two things that connect in this way.
My tablesaw guard includes a dust collection shroud with a 2 1/2” port that rides over the blade to catch errant dust. I also need the same kind of 2 1/2” flex hose to collect dust and shavings from my router table, though never from both the tablesaw and router at the same time. In this case a single Y fitting is the best way I’ve found to make this connection. Spliced into one of the 4” lines, with a 2 1/2”-to-4” adaptor on the remaining open end of the Y, one 2 1/2” flex hose spends most of the time connected to the tablesaw shroud. When it’s time to use the router table, just pull off the hose and connect it to the router table fence while you’re making trim and molding. Since the speed of air flow delivered by a dust collector is lower than a shop vac, I need to close all other blast gates to direct enough suction to run the router table cleanly.
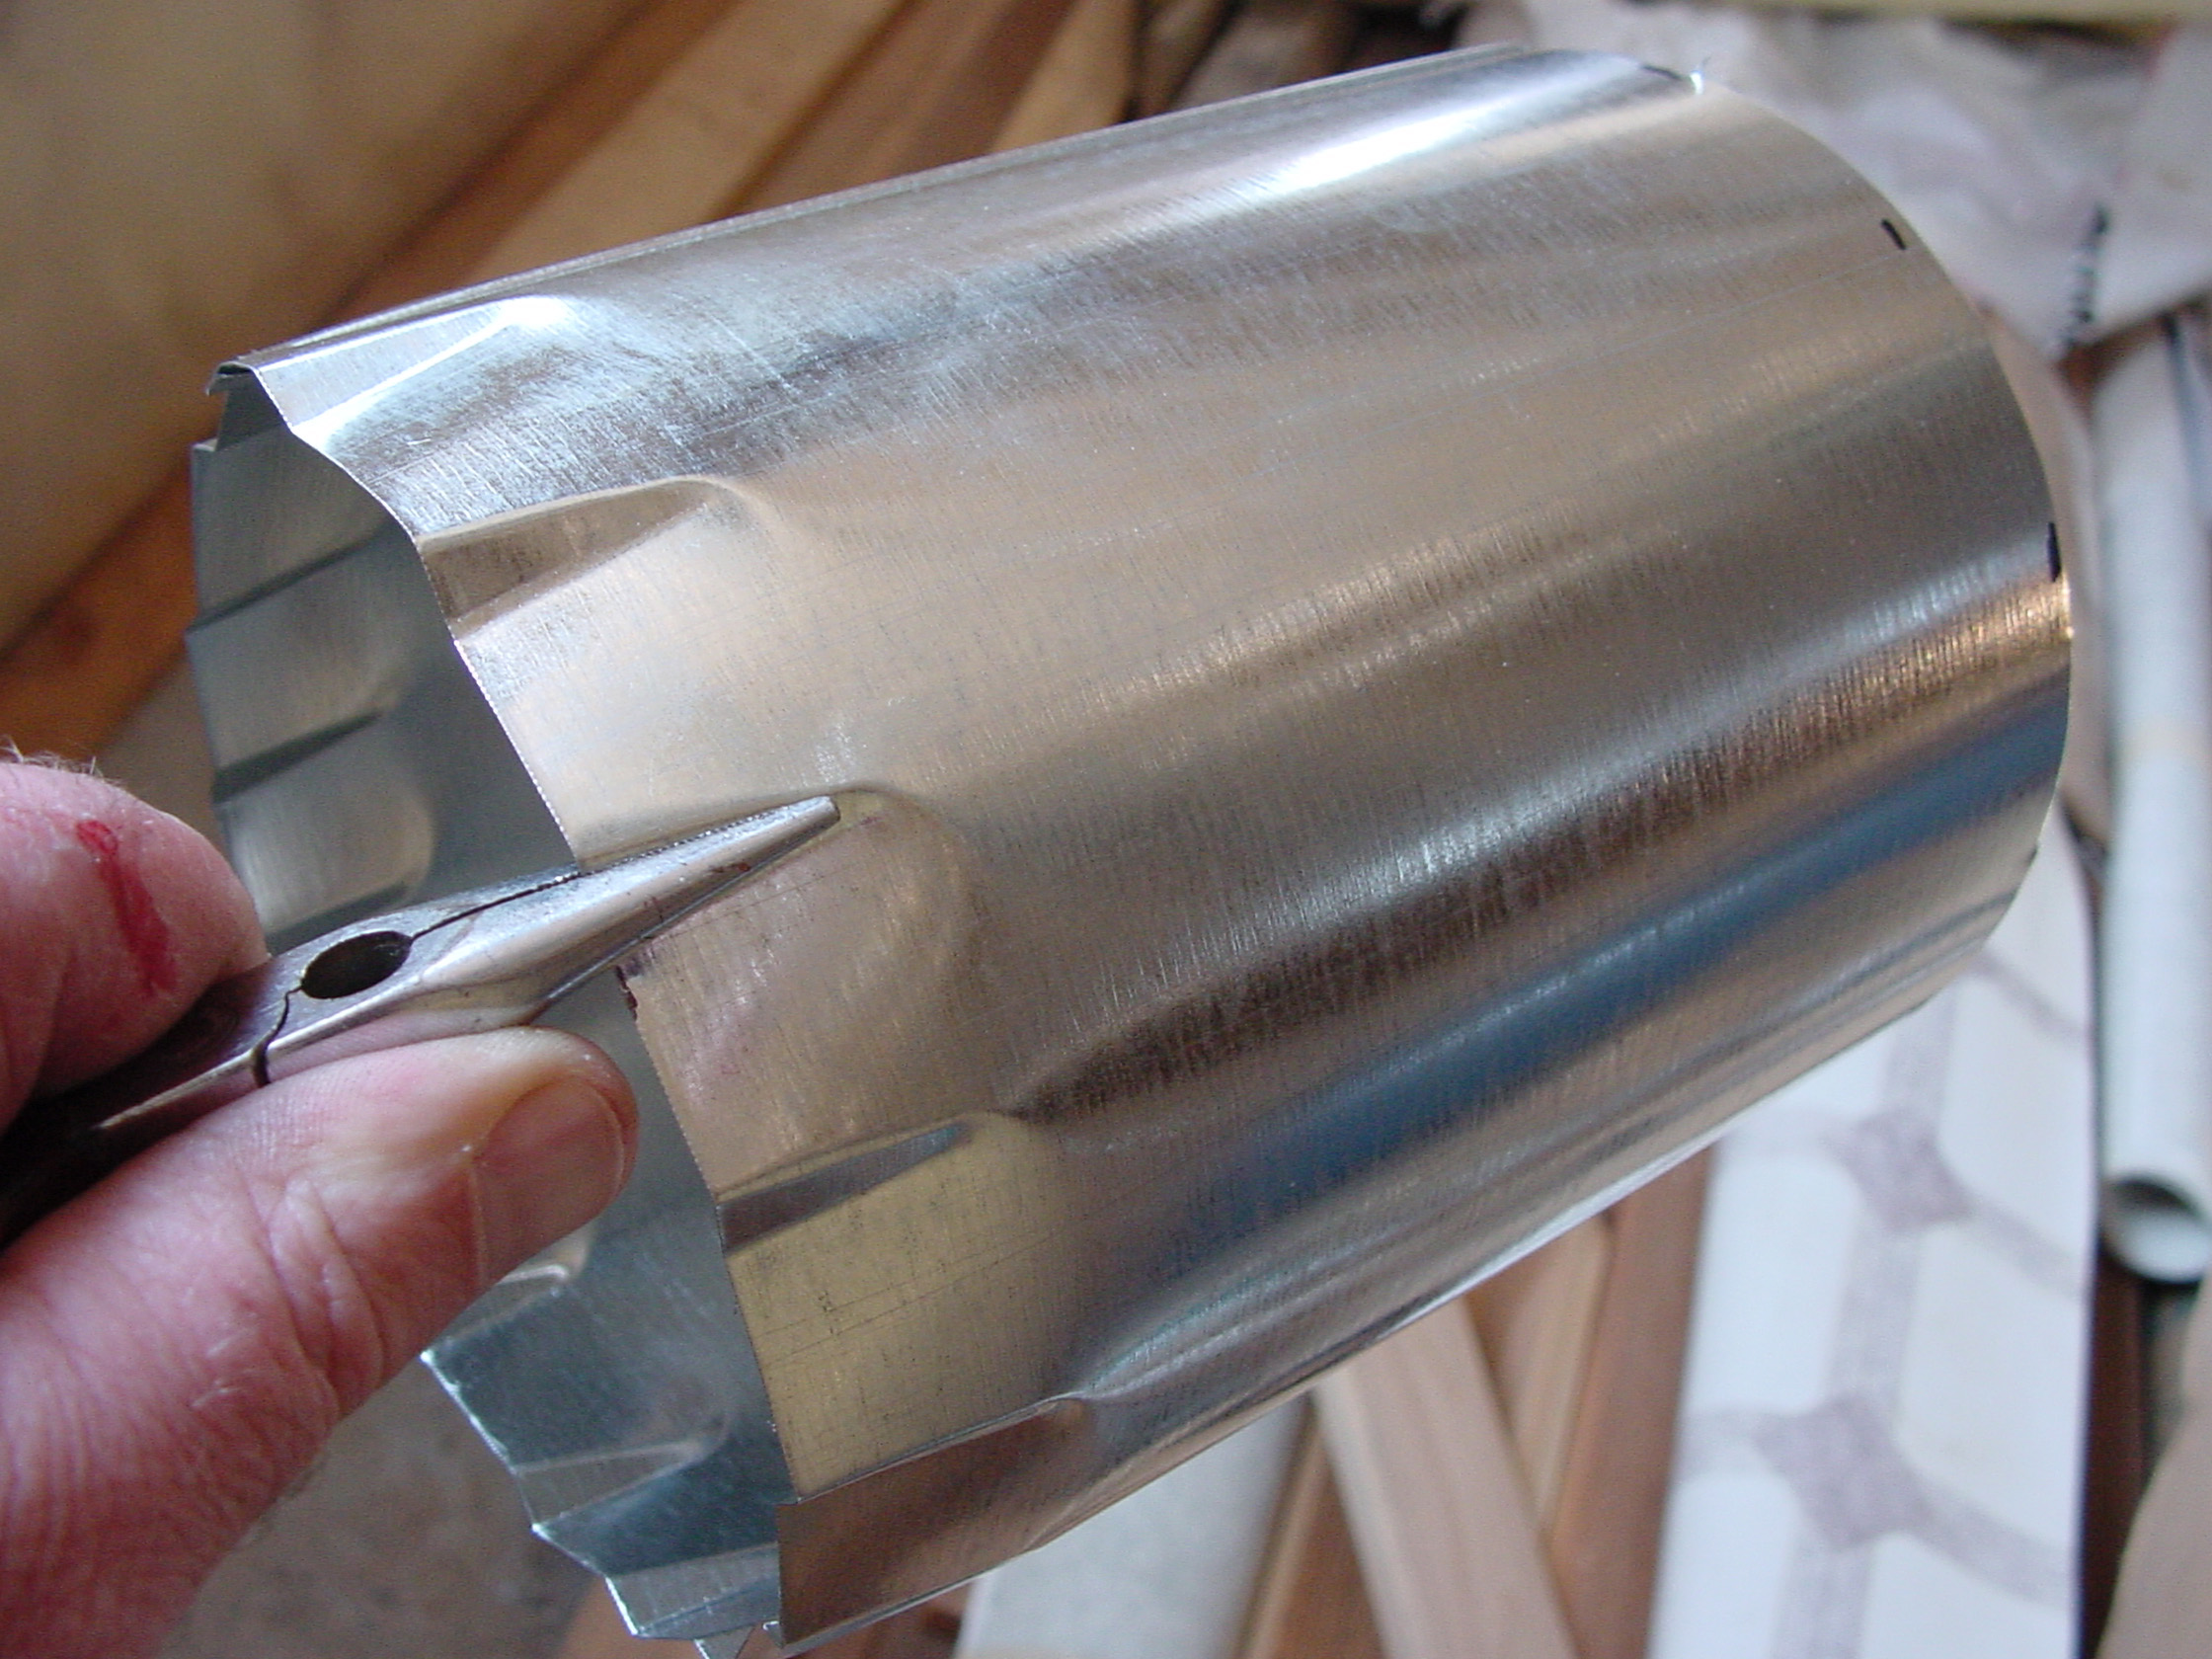 Snap lock pipe has a central seam that allows pipe to be cut to length easily with ordinary snips, but since spiral pipes come assembled and circular from the factory, cutting is trickier. For this job, I used a power hacksaw. Made by several tool companies, and available for rent, these power tools make it fast and easy to cut spiral pipe. For those times when you need to establish (or re-establish) a crimped end on a pipe that’s being joined to a fitting or another pipe, get your hands on a crimping tool. It’s a set of specialized pliers that creates a wavy, crimped pattern on the last inch of pipe. This makes the pipe slightly smaller, allowing it to slide into neighbouring ducts to complete joints. You can do the same job with a pair of needlenose pliers, as you can see above, though the results won’t be quite as nice.
Wood dust poses a real health hazard, and the risks aren’t just about some obscure, long-term physical outcome that won’t emerge for years. It’s not unusual for me to hear from woodworkers who’ve developed debilitating wood allergies because they didn’t take workshop dust control seriously early on. The allergy risk is especially high if you work with cedar or tropical woods, though any kind of wood dust demands respect. It’s far wiser to control dust early in your career, before dust sensitivities set in, rather than waiting until you can’t function in the shop without a dust collector running and a mask on your face. Dust collection isn’t the reason you got interested in woodworking, but it can make your time in the shop more enjoyable and safer. The only regret you’ll likely feel after installing your own system is that you didn’t do it sooner.